
Mastering Bleed Control Techniques With Everyday Survival Gear
8 min read Learn practical bleed control techniques using everyday survival gear to save lives in emergencies. (0 Reviews)
Mastering Bleed Control Techniques With Everyday Survival Gear
Bleeding out is one of the leading causes of preventable death after traumatic injuries. Whether you find yourself in a natural disaster, an accident while hiking, or any emergency far from professional medical help, knowing how to control bleeding using everyday survival gear can truly save a life — maybe even your own.
Why Bleed Control Is Critical
The human body contains approximately 5 liters of blood. Losing about 40% of blood volume can cause hypovolemic shock and death within minutes if untreated. According to the Stop the Bleed campaign—a widely recognized international initiative—immediate intervention can dramatically improve outcomes by stemming blood loss until advanced care arrives.
Everyday Gear: Your First Line of Defense
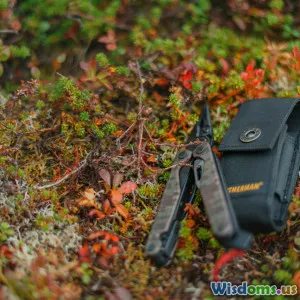
You don’t need high-tech medical kits to control bleeding effectively. Everyday items found in a backpack, glove compartment, or kitchen can serve as improvised tools for hemorrhage control. Understanding how to adapt these items is key.
Common Survival Gear and Their Uses
| Item | Use in Bleed Control |
|---|---|
| Clean cloths or T-shirts | Apply direct pressure to wounds |
| Bandanas/scarves | Wrap wounds to apply pressure or create tourniquets |
| Gloves (latex or nitrile) | Protect yourself from bloodborne pathogens |
| Plastic bags or cling film | Create sterile layers or seal wounds |
| Paracord or shoelaces | Serve as tourniquets or binding material |
| Spoon/spatula | Use as a ligature bar under tourniquets |
Bleed Control Techniques Using Everyday Gear
Step 1: Scene Safety and Personal Protection
Before approaching an injured person, ensure the scene is safe. Use gloves if available to avoid contact with blood and bodily fluids, reducing infection risk.
Step 2: Direct Pressure
The simplest and most effective way to stop bleeding is sustained direct pressure. Place a clean cloth or folded T-shirt over the wound and press firmly.
Evidence: Studies show that direct pressure alone stops bleeding in approximately 85% of limb injuries.
Step 3: Elevation
When possible, elevate the injured limb above heart level to reduce blood flow. Be cautious if fractures are suspected.
Step 4: Pressure Dressings
If bleeding persists, apply additional layers of cloth, wrapping tightly but not cutting off circulation. Improvised bandanas work well here.
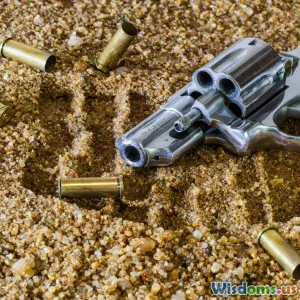
Step 5: Improvised Tourniquets
For severe arterial bleeding where direct pressure doesn’t suffice—especially in limbs—tourniquets can be lifesaving.
To create one, use a bandana, scarf, or paracord and place it 2-3 inches above the wound (closer to the torso). Place a rigid object like a pen or spoon under the cord, then twist to tighten until bleeding slows or stops. Secure it in place.
NOTE: Although tourniquets were once avoided due to fear of limb damage, modern research supports their use when properly applied and monitored.
Real-World Insights
Jessica Westfall, an emergency medical responder, emphasizes, “In remote areas, what you carry can mean the difference between life and death. Improvised tools often save people because the window for professional care is too long.”
Consider the survivor story of a hiker who used a spare T-shirt and shoelace as a tourniquet after severely cutting his leg on rocky terrain—his quick action kept him conscious until rescue.
Training and Practice
The effectiveness of these techniques hinges on knowledge and practice. Many organizations worldwide offer Stop the Bleed training courses open to civilians.
Tips for Practicing Bleed Control at Home
- Keep a kit with gloves, bandanas, and clean cloths ready.
- Simulate scenarios with family members to apply pressure and understand timing.
- Learn proper tourniquet placement and tightening techniques.
Additional Considerations
-
Infection prevention: Always avoid reuse of materials unless sanitized. If bandages become soaked, apply more layers instead of removing initial ones.
-
Monitoring: Note the time a tourniquet is applied, communicate this to responders, and loosen only under medical supervision.
-
Psychological readiness: Managing bleeding can be a distressing task; mental preparedness improves performance under pressure.
Conclusion
Bleed control is an essential survival skill that doesn't require specialized equipment if you understand how to adapt everyday gear for hemorrhage management. Direct pressure, elevation, pressure dressings, and improvised tourniquets can prevent fatal blood loss in emergencies.
By equipping yourself with the knowledge and practicing these techniques regularly, you become your own first responder and a powerful asset in helping others. Remember, minutes matter—your quick action with simple tools can make all the difference.
Make it a priority to assemble a basic bleeding control kit from everyday items and invest in formal training if possible. Being ready means saving lives when unexpected emergencies strike.
References:
- American College of Surgeons, Committee on Trauma, Stop the Bleed Initiative
- Johns Hopkins Medicine, Hemorrhage Control Techniques
- Cody L. Dunna et al., Journal of Trauma and Acute Care Surgery, 2017
- Survivor testimonies from wilderness emergency case studies
Equip. Learn. Act. Survive.
Rate the Post
User Reviews
Other posts in First Aid & Emergency Medical


Popular Posts


