StepbyStep Guide to Building Floating Shelves Using Recycled Wood
8 min read Discover how to build stylish floating shelves using recycled wood with our detailed, eco-friendly DIY guide. (0 Reviews)
Step-by-Step Guide to Building Floating Shelves Using Recycled Wood
Floating shelves have surged in popularity for their sleek, minimalist aesthetic and incredible functionality. But what if you could create these chic storage solutions without buying new materials, while also contributing to sustainability efforts?
Welcome to your comprehensive, eco-friendly guide to building floating shelves from recycled wood. Whether you're a seasoned woodworker or a beginner looking to add DIY charm to your home, this tutorial empowers you to create beautiful, sturdy shelves while reducing waste.
Why Choose Recycled Wood?
Using recycled wood isn't just about aesthetics; it’s a conscious choice to reduce demand for freshly harvested timber and cut down on waste. Reclaimed wood offers character—weathered textures, nail holes, and patinas can add unique visual depth that new lumber cannot replicate.
Interesting Insight: According to the Environmental Protection Agency (EPA), building materials make up about 600 million tons of solid waste annually in the U.S. By repurposing wood, we decrease landfill contributions and lower the carbon footprint of new furniture production.
Finding reclaimed wood can be as simple as salvaging an old pallet, refurbishing discarded furniture, or buying from local salvage yards or online platforms like Craigslist or Facebook Marketplace.
Tools and Materials Needed
Before starting, ensure you have the following:
- Recycled wood boards (preferably 1x8 or 1x10 boards for shelf thickness around ¾ to 1 inch)
- Stud finder
- Drill and drill bits
- Level
- Measuring tape
- Wood screws (3-inch screws are ideal)
- Floating shelf brackets (specifically designed to be hidden inside the shelf)
- Sandpaper or electric sander (120–220 grit)
- Wood stain or paint (optional for finishing)
- Wood filler and putty knife (for patching imperfections)
- Safety gear (gloves, goggles, dust mask)
Step 1: Selecting and Preparing Your Recycled Wood
Choose Quality Wood: Inspect wood thoroughly. Look for dry, solid pieces free from excessive rot or insect damage.
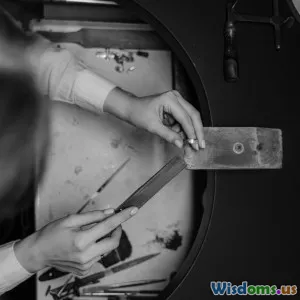
Clean and Sand: Remove old nails or screws. Sand the wood to eliminate rough patches, splinters, and old finishes. Start with 120 grit sandpaper and finish with 220 grit for a smooth surface.
Patch and Fill: Use wood filler to cover cracks or holes. This step is crucial for a polished final look.
Consider applying a light wood bleach solution if coloration is uneven and you want a uniform tone.
Step 2: Measuring and Cutting Your Shelves
Determine Shelf Dimensions: Common floating shelf depths range from 8 to 12 inches. Length depends on your wall space—typically between 24 to 48 inches.
Cutting: If you don’t have access to a table saw or miter saw, many hardware stores offer cutting services. Ensure your edges are straight and square to make installation easier.
Tip: Cutting one shelf first and using it as a template for others helps maintain consistency.
Step 3: Installing Floating Shelves Brackets
Floating shelves rely on specialized brackets with rods that slide into the back edge of the shelf, supporting weight invisibly.
Locating Studs
Use the stud finder to locate studs in your wall—these provide the strongest anchor points and prevent shelves from sagging or pulling out.
Mark stud locations with a pencil.
Attaching Brackets
- Hold the bracket against the wall aligned with stud marks.
- Use a level to ensure it's perfectly horizontal.
- Drill pilot holes to avoid splitting the wall’s drywall or wood studs.
- Secure the bracket with 3-inch lag screws for maximum stability.
Repeat for each bracket—typically two brackets support shelves up to 36 inches; longer shelves may need three.
Step 4: Mounting the Shelf
- Drill matching holes into the back side of the shelf that align with bracket rods.
- Slide the shelf onto the brackets carefully.
- For added security, some builders add small screws underneath into the bottom lip of the bracket.
Pro Tip: Leave a small gap at the back during placement for wall irregularities, then push the shelf tight, ensuring it appears truly floating.
Step 5: Finishing Touches
- Apply wood stain or paint to enhance beauty and protect the wood.
- Consider matte or satin finishes for a natural look.
- For heavily weathered wood, use a sealant to safeguard against crumbling.
Maintenance Advice
Occasionally dust your shelves and inspect brackets for any loosening. With proper care, floating shelves using recycled wood can last decades and become a centerpiece in your décor.
Real-World Example: From Pallet to Panache
Lisa, a DIY enthusiast in Portland, reclaimed wood pallets from a local brewery to install floating shelves in her kitchen. Using the above steps, she transformed rough pallet planks—cleaning, sanding, and staining them a warm honey tone. She proudly reports that not only did her shelves complement her rustic theme, but she saved nearly $100 compared to buying new wood. Her project boosted confidence and spurred her interest in sustainable woodworking.
Conclusion: Sustainable Style Within Reach
Building floating shelves from recycled wood combines creativity, environmental responsibility, and home improvement into one rewarding DIY experience. With patience and the right tools, anyone can make sleek, sturdy shelves that tell a story beyond mere function.
By choosing reclaimed materials, you embrace a unique design trend while supporting sustainability. Start small, share progress with friends, and enjoy the satisfaction of craftsmanship rooted in respect for the planet.
Ready to begin? Gather your wood, lay out your tools, and let's build shelves that float your style and elevate your space—hooked on making homes greener and more beautiful one plank at a time.
Quote to Inspire:
"Sustainability is not just a goal, it’s a way of creating beauty without compromise." – Unknown
Happy building!
Rate the Post
User Reviews
Other posts in Home Decor
Popular Posts


