Top Ten Tools Every DIY Car Mechanic Must Own
33 min read A clear checklist of the top ten tools every DIY car mechanic needs, with buying tips, must-have specs, and examples for safe, efficient home garage repairs. (0 Reviews)
Great DIY car work doesn’t start with exotic skills; it starts with the right tools. The best home mechanics don’t just turn bolts—they diagnose smartly, tighten correctly, and keep themselves safe. Whether you’re changing brakes, chasing an electrical gremlin, or tackling a suspension refresh, these ten tools form a core kit that saves time, reduces mistakes, and protects your vehicle. Below, you’ll find not only what to buy, but how to use each tool confidently, with real-world examples, safety tips, and buying advice.
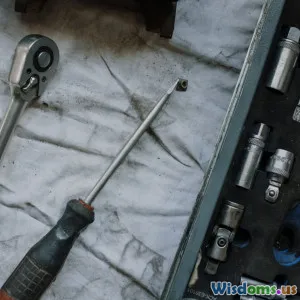
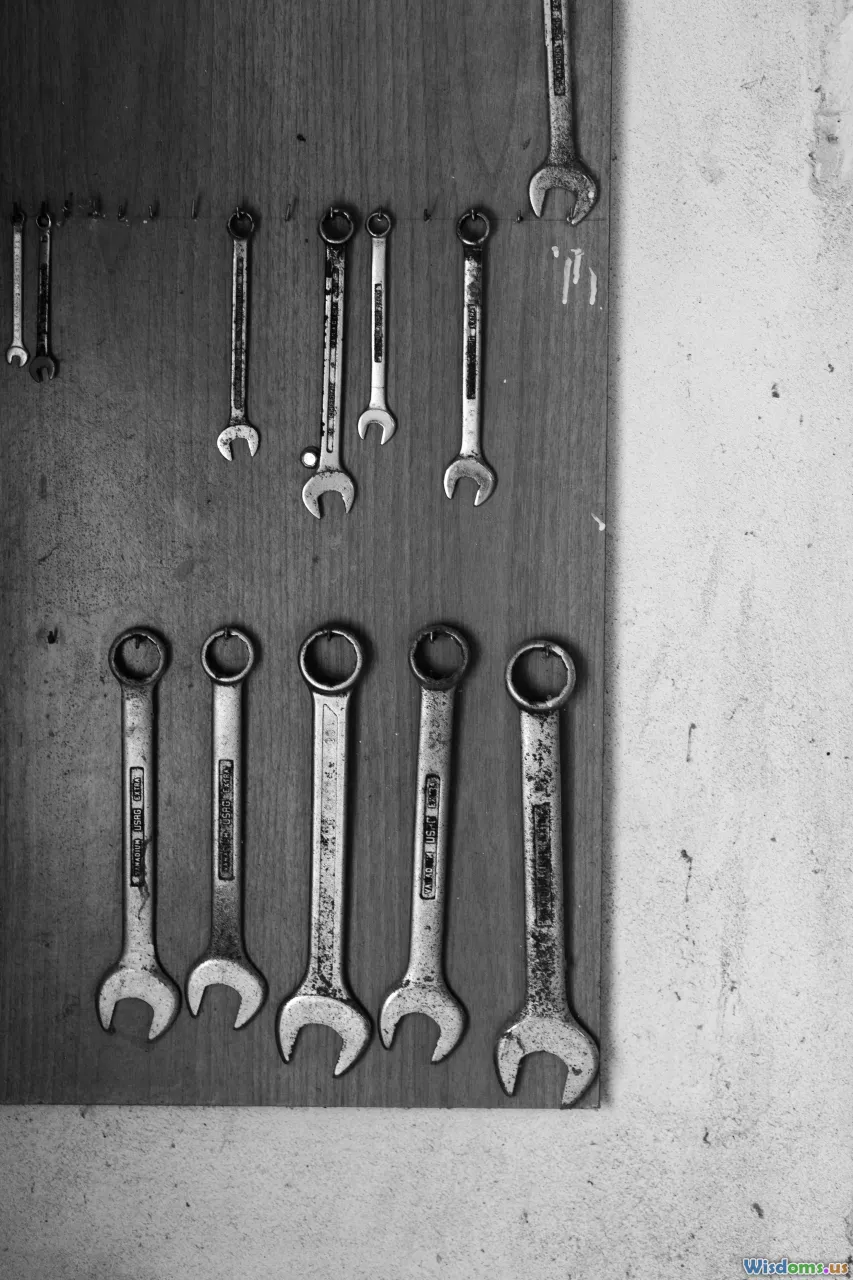
A Complete Socket and Ratchet Set: The Foundation of Every Repair
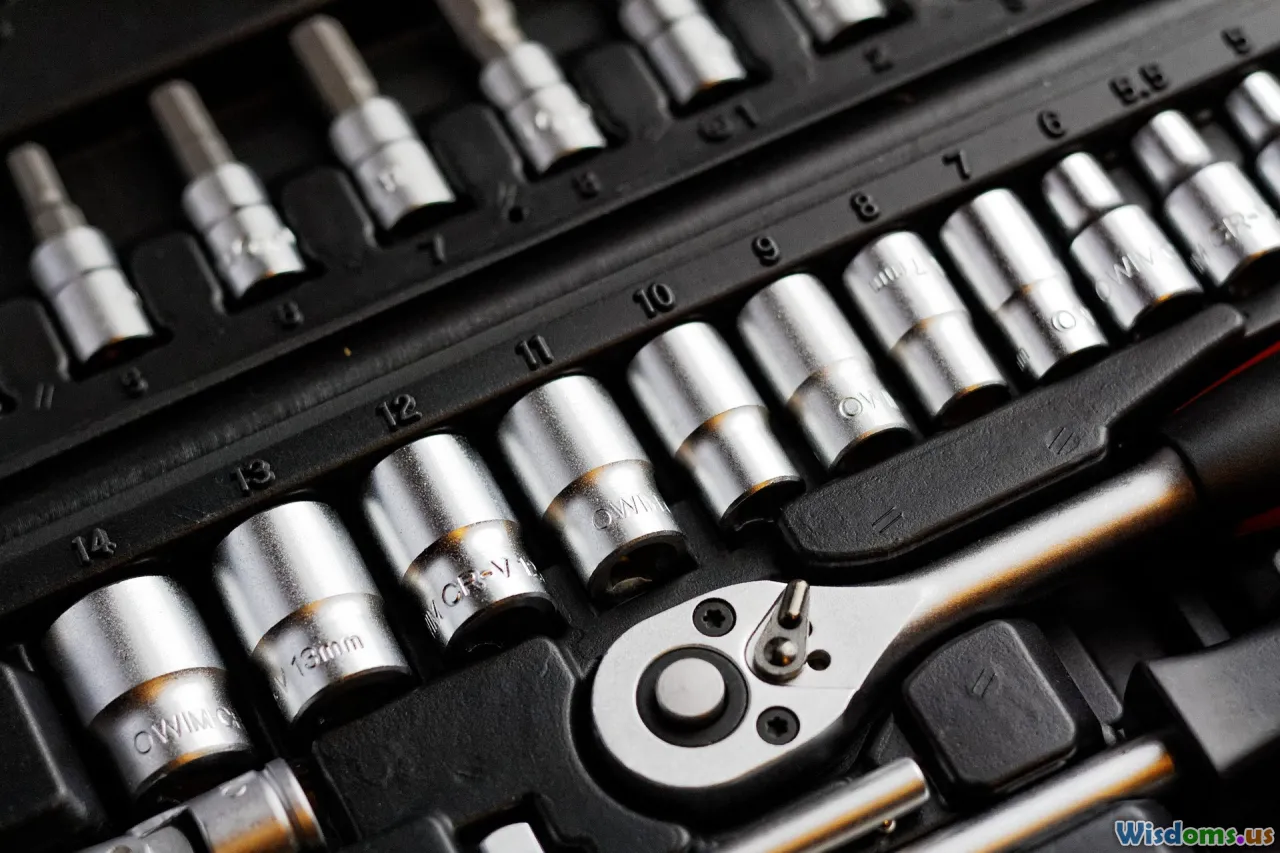
A well-rounded socket and ratchet set is the skeleton key to most fasteners on a modern car. If you buy only one “set,” make it this one—and make it comprehensive.
What to look for:
- Drives: 1/4-inch, 3/8-inch, and 1/2-inch drive ratchets. Each shines at different jobs: 1/4-inch for interior and trim, 3/8-inch for most engine bay tasks, 1/2-inch for suspension and lug nuts.
- Sockets: Both metric and SAE. Many modern cars are metric-heavy, but a mixed set covers everything, including accessories and older vehicles.
- Six-point sockets: Less likely to round fasteners compared to 12-point, especially on stubborn bolts. Keep 12-point for low-torque, tight-clearance situations.
- Shallow and deep sockets: Deep sockets reach over protruding studs (like on shock mount nuts); shallow sockets fit in tight spaces.
- Extensions and universal joints: A 3-inch and 6-inch extension handle most jobs; a wobble or universal joint helps around obstructions.
Examples of common sizes:
- 10 mm is the MVP for many Japanese and European cars—buy duplicates. 12, 13, 14, 17, 19, and 21 mm cover brake components, battery clamps, and suspension hardware.
- Specialty sockets to consider: a 5/8-inch (or 16 mm) spark plug socket with magnetic or rubber insert; a 22 mm O2 sensor socket with a side cutout for the wire.
Usage tips:
- Seat the socket fully before applying force; rocking it on a half-engaged fastener is how corners get rounded.
- Use impact-rated sockets for impact wrenches; chrome hand sockets can shatter under impact loads.
- Keep a small parts tray or magnetic dish nearby for bolts—lost fasteners stall progress.
Quality and cost:
- Chrome vanadium steel is common for hand tools. Good mid-tier sets from reputable names last for years and often include lifetime warranties.
- The joy of a well-designed ratchet (fine-tooth, low swing arc, comfortable handle) is real—it’s the difference between a fight and a flow.
Torque Wrench: The Difference Between “Tight” and “Right”
A torque wrench turns guesswork into precision. Over-tightened bolts can stretch or break; under-tightened hardware backs out and causes failures. Torque specs exist because materials and thread sizes have limits.
Types:
- Click-type (mechanical): The classic choice. Affordable, durable, and accurate to about ±4% when maintained.
- Beam-style: Simple and reliable; ideal for quick checks but harder to read in tight spaces.
- Digital: Great for data logging and angle measurement; more expensive but feature-rich.
Which sizes to own:
- 3/8-inch drive torque wrench (roughly 10–80 ft-lb / 13–108 N·m): perfect for spark plugs, valve covers, and smaller suspension hardware.
- 1/2-inch drive torque wrench (roughly 30–250 ft-lb / 40–340 N·m): for lug nuts, axle nuts, and larger bolts.
Real-world examples:
- Lug nuts: Typically 80–100 ft-lb on passenger cars; trucks/SUVs can be higher. Always check the service manual.
- Spark plugs: Often 10–18 ft-lb (13–25 N·m), especially on aluminum heads where over-tightening is expensive.
- Oil drain plugs: Commonly around 22–30 ft-lb; many stripped pans were victims of “good and tight.”
How to use it right:
- Set the torque value, then pull steadily at the handle until the click. Don’t jerk or bounce.
- Never use a torque wrench as a breaker bar to loosen bolts.
- Back the setting down to its lowest torque after use to preserve the spring.
- Consider an angle gauge for torque-to-yield (TTY) bolts (e.g., head or some suspension bolts) that require a final angle turn after a base torque.
Calibration and care:
- Get it calibrated every 1–2 years if you use it often. Store it clean and dry.
- Avoid dropping it; one fall can ruin accuracy.
Floor Jack and Jack Stands: Take Weight Off Your Worries

Getting under a car safely is non-negotiable. A hydraulic floor jack lifts; jack stands hold. Never rely on a jack alone—hydraulics can fail.
What to buy:
- Floor jack: A 2–3 ton (4,000–6,000 lb) jack suits most cars. Low-profile jacks slide under lowered vehicles and modern cars with low splitters.
- Jack stands: Choose stands that meet ASME PASE standards (the current standard is ASME PASE-2019). Look for double-locking mechanisms and wide bases for stability.
- Check the rating: Some stands are rated “per pair,” others “per stand.” Read the label so you know what weight each can support.
Best practices:
- Use factory lift points—look for reinforced pinch welds or frame pads. Consult the manual if unsure.
- Chock wheels not being lifted. Parking brake on. Gear in Park (auto) or first gear (manual).
- Lift on a flat, solid surface. Dirt or sloped driveways are dangerous. If needed, place a thick, solid wood block to spread load, not to increase height recklessly.
- Once on stands, give the vehicle a firm shove at the bumper to ensure it’s stable.
Jack care and technique:
- Bleed trapped air if the jack feels spongy (most manuals outline a simple procedure).
- Protect pinch welds with a jack pad adapter to avoid bending metal and cracking seam sealer.
Use-case examples:
- Wheel and tire rotations, brake jobs, and oil changes become straightforward once you can lift and secure the vehicle quickly and safely.
- A low-profile 3-ton jack can reach crossmembers on many modern sedans and small SUVs, letting you place stands at both sides efficiently.
OBD-II Scanner: See What the Car Sees
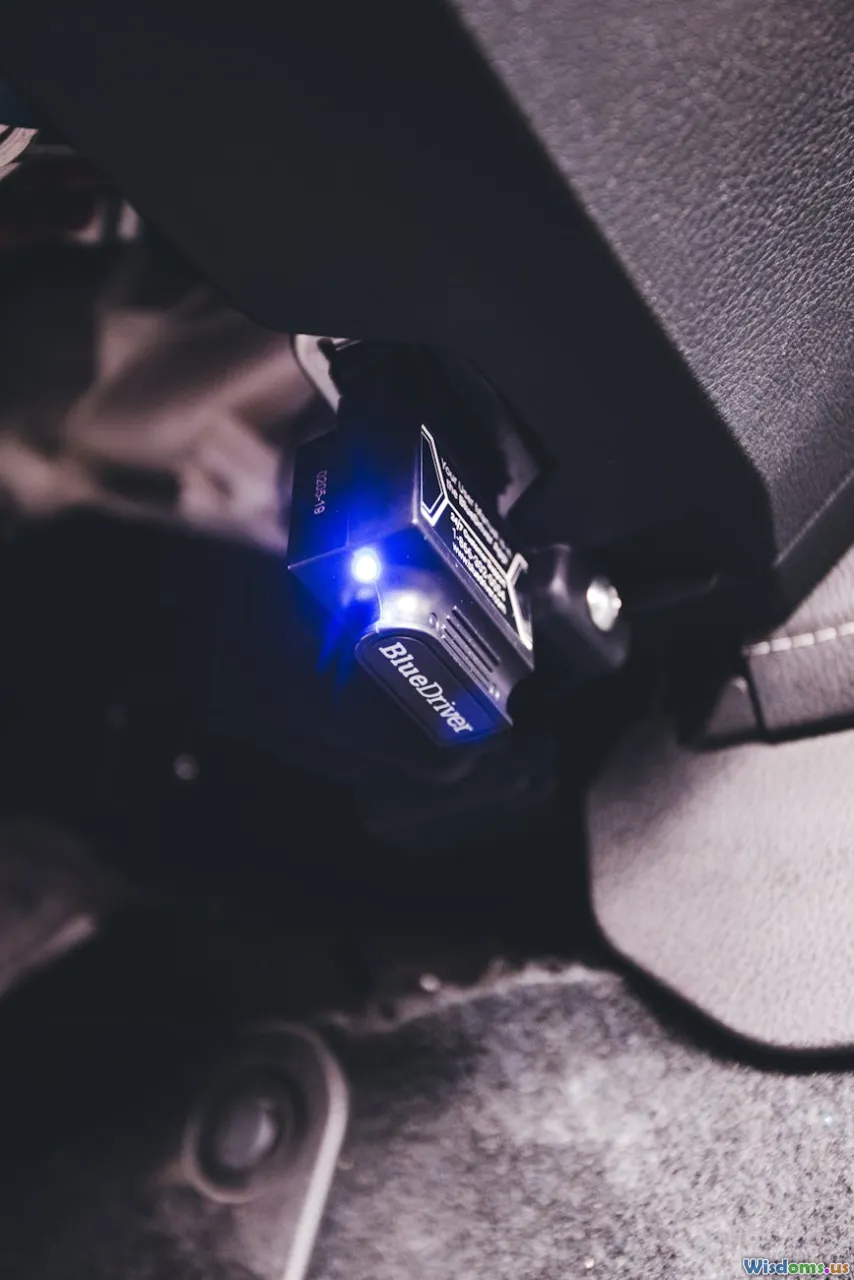
If your car was sold in the U.S. since 1996, it supports OBD-II. That means you can read diagnostic trouble codes (DTCs), monitor live data (PIDs), and check emissions readiness without a shop visit. Europe’s EOBD and other global variants are similar.
Types of scanners:
- Basic code readers: Read/clear codes and display readiness monitors. Good for quick checks.
- Bluetooth/Wi-Fi adapters: Pair with apps (Torque, Car Scanner, OBDeleven, etc.) for rich live data and logging; beware of cheap ELM327 clones that can be unreliable or unsafe.
- Mid-to-pro handheld units: Faster refresh, bidirectional controls on some models (e.g., cycling an EVAP purge solenoid), and manufacturer-specific PIDs.
What you can do:
- Read codes and freeze-frame data: For example, P0301 (cylinder 1 misfire) often pairs with freeze-frame listing engine load, RPM, and coolant temp at the moment it set—gold for diagnosis.
- Watch live O2 sensor voltages: Upstream sensors should swing roughly 0.1–0.9 V at warm idle. A flatline suggests a failed sensor or circuit.
- Track fuel trims: Short-term (STFT) and long-term (LTFT) near zero are healthy. Values consistently above +10% can indicate vacuum leaks; significantly negative values may suggest a rich condition or leaking injector.
- Mode $06 data: Unsung hero for misfire counts, catalyst efficiency metrics, and onboard tests that haven’t set a code yet.
Tips to avoid pitfalls:
- Don’t clear codes before a smog check; it resets readiness monitors. Drive cycles are required to set them again.
- When chasing intermittent faults, log data during a test drive: fuel trims, misfire counters, MAF reading (g/s), and throttle position.
Example workflow:
- Rough idle and flashing MIL under load? Scan shows P0301. Swap cylinder 1 ignition coil with cylinder 2 and clear codes. If misfire moves to P0302, the coil is suspect. If it stays, check injector pulse, compression, and spark plug.
Digital Multimeter: Your Electrical Truth Meter

A digital multimeter (DMM) is essential for electrical diagnosis. Look for auto-ranging, a backlight, and fused current inputs. True RMS isn’t critical for most DC automotive work but is a nice-to-have for accuracy on some waveforms.
Must-have features:
- Voltage, resistance, continuity with audible beep, and diode test.
- 10 A fused current range for intermittent draw checks.
- Min/Max capture to catch transient issues.
- CAT safety ratings (CAT II or higher) for protection; while automotive systems are low-voltage DC, standards still matter for robustness.
Key tests and numbers:
- Battery health: A fully charged lead-acid battery should rest around 12.6–12.8 V. During cranking, voltage shouldn’t sag below ~9.6 V. With engine running, alternator charge is typically 13.8–14.7 V.
- Alternator ripple: Set to AC volts and measure at the battery; ideally below ~0.3–0.5 V AC. Higher ripple can signal failing diodes.
- Parasitic draw check: Modern cars often have a normal key-off draw between 20–50 mA. Anything over ~80 mA sustained can drain a battery over days.
How-to: quick parasitic draw diagnosis (voltage-drop across fuses method):
- Let the car sleep: doors closed, hood latched, wait 20–45 minutes for modules to time out.
- Measure millivolts across each fuse. Convert voltage drop to current using a fuse-resistance chart (many are available online).
- The circuit with a significant draw narrows your hunt without breaking the circuit like an ammeter would.
More electrical checks:
- TPS sweep: Back-probe the throttle position sensor signal wire; a smooth rise from ~0.5 V closed to ~4.5 V wide open indicates a healthy sensor.
- Continuity on grounds: A corroded ground strap creates strange symptoms. Voltage drop under load (less than ~0.2 V) across a ground path indicates a good connection.
Safety and care:
- Never measure current with leads in the amp jack when intending to check voltage—this blows fuses.
- Don’t test resistance on a live circuit. Power off, then measure.
Cordless Impact Wrench: Controlled Force for Stubborn Fasteners
The modern 1/2-inch cordless impact wrench delivers shop-level power at home. It removes stubborn fasteners fast—think lug nuts, suspension bolts, crank pulley bolts on some engines—and saves your wrists.
Choosing the right tool:
- Mid-torque (around 300–600 ft-lb fastening, 450–700 ft-lb breakaway): All-purpose powerhouse that’s compact enough for most DIY tasks.
- High-torque (700–1,000+ ft-lb breakaway): For the truly stuck or for trucks. Heavier and bulkier.
- 3/8-inch compact impact: Handy in tight engine bays for smaller fasteners; less risk of overkill.
Usage best practices:
- Always use impact-rated sockets and extensions; they’re black, made of tougher steel, and absorb shock.
- Start bolts by hand to avoid cross-threading. Use the impact only after threads are engaged.
- Don’t rely on impacts for final torque on critical items (wheels, suspension). Finish with a torque wrench.
- Torque sticks can help with lug nuts, but variations in gun power and battery charge can change results; torque wrench verifies correctness.
Noise and safety:
- Impacts are loud; wear hearing protection. Eye protection is non-negotiable.
Real-world example:
- A seized lower control arm bolt on a 10-year-old car may laugh at a standard ratchet. A mid-torque impact usually breaks it free in seconds, especially after penetrating oil has had time to work.
Battery ecosystems:
- Consider aligning your impact wrench with a battery platform you already own (drill, driver, light). Cross-compatibility saves money.
Pliers and Specialty Grippers: Control the Uncontrollable

Not every job is about bolts. Hoses that fuse to barbs, clamps that pinch fingertips, and clips that snap—these are daily battles that the right pliers win.
Tools to include:
- Needle-nose pliers: Reach into tight spots; great for pulling cotter pins and electrical connectors.
- Locking pliers: Clamp on stripped bolts or broken fasteners for extraction; act as an extra hand.
- Tongue-and-groove pliers: Adjustable jaws for large fittings, stubborn hoses, and plumbing-style nuts.
- Hose clamp pliers: For spring clamps in cooling and intake systems—way better than wrestling with a screwdriver.
- Flush cutters and side cutters: Clean cuts on zip ties and safety wire; avoid nicking wires with dull tools.
- Flare-nut wrenches (line wrenches): Preserve soft brake and fuel line fittings; they grip five sides and drastically reduce rounding.
How-to: removing a stuck coolant hose without damage:
- Loosen the clamp fully and slide it away from the barb.
- Use tongue-and-groove pliers to gently twist the hose at the barb to break the bond—don’t just pull.
- Insert a plastic hose pick or a small flat tool under the edge and work around the circumference to release it.
- Pull straight off; clean the barb and inspect for corrosion before reinstalling.
Smart add-ons:
- Magnetic pickup tool and telescoping mirror: Retrieve dropped fasteners and inspect hidden areas without disassembling half the engine bay.
- Plastic trim removal tools: Avoid marring interior panels and protect paint when working on bumpers.
Breaker Bar, Penetrating Oil, and Heat: Your Seized-Fastener Toolkit

Rust and time are unkind to fasteners. When threads corrode or thread lockers harden, brute force is not the only answer—controlled strategy is.
Core components:
- Breaker bar: A 1/2-inch drive, 18–24 inches long, gives leverage without risking the mechanism of a ratchet.
- Penetrating oil: Products like PB Blaster or Kroil wick into threads; they need time—minutes to hours—to work.
- Heat: MAP-Pro (hotter than propane) or an induction heater expands the nut, breaks rust bonds, and softens thread lockers.
Technique tips:
- Preload and patience: Apply a steady force with the breaker bar while a helper taps the fastener head with a brass hammer to shock the threads.
- Tighten a hair before loosening: Micro-movements can crack the rust seal.
- Six-point sockets: Use these on rusted bolts to reduce rounding. If the head is already compromised, consider bolt extractor sockets.
- Apply penetrating oil well ahead of time, reapply, and reattempt after capillary action has done its job.
Heat use and safety:
- Heat the nut, not the bolt, to expand the outer threads. Avoid open flame near fuel lines, plastic tanks, or rubber components. Keep a fire extinguisher within reach.
- Induction heaters are safer around fuel systems and paint; they heat the metal fastener directly.
Example: stubborn O2 sensor
- Warm up the exhaust slightly (not scalding). Apply penetrating oil, wait, then use an O2 sensor socket with a breaker bar. If it resists, add controlled heat to the bung area, then attempt removal while supporting the sensor wire.
Brake Service Tools: Stop with Confidence

Brakes are a high-stakes DIY job—you can do them safely and professionally with the right tools. These let you clean, measure, compress, and torque correctly.
Must-haves:
- Caliper piston compressor: A C-clamp works for many front calipers; for rear calipers with integrated parking brakes, use a wind-back tool to rotate the piston as it retracts.
- Torque wrench: Caliper guide pins and bracket bolts have specific specs; over- or under-torquing can cause noise or failure.
- Brake bleeder kit: A hand vacuum pump or pressure bleeder makes fluid replacement cleaner and more thorough.
- Wire brush and brake cleaner: Remove rust and contamination from pad slides and hub faces.
- High-temp silicone brake grease: For guide pins and pad ears where specified; avoid petroleum grease on rubber components.
Numbers and procedures:
- Pad bedding: Follow the pad manufacturer’s procedure—often several medium stops from 30–40 mph to transfer a uniform layer of material onto rotors.
- Rotor checks: Inspect minimum thickness stamped on the rotor hat. If below spec after machining, replace. Excessive runout can cause pulsation; cleaning hub rust and using a torque wrench helps prevent it.
- Typical torques: Caliper slide pins often 20–30 ft-lb; caliper bracket bolts can be 70–100 ft-lb. Bleeder screws are low—around 7–10 ft-lb; don’t overdo it.
Bleeding sequence:
- Common sequence on front-engine, rear-drive layouts: Right rear, left rear, right front, left front (farthest to nearest). Some ABS systems and diagonally split systems differ—check the manual.
- Keep the reservoir topped off; don’t let air enter the master cylinder. If it does, a bench bleed may be required.
Fluid facts:
- DOT 3 and DOT 4 are glycol-based and absorb moisture, reducing boiling point over time; a 2–3 year change interval is good practice.
- Never mix DOT 5 (silicone-based) with glycol fluids.
Oil and Fluid Service Tools: Clean, Quick, and Leak-Free

Routine fluid service is the heart of DIY maintenance. Having the right oil and fluid tools prevents messes, stripped threads, and guesswork.
Core tools:
- Oil filter wrench: Match the wrench to your filter cap or canister. Many Toyota and Honda canisters use a specific 64 mm, 14-flute cap; strap and band wrenches fit traditional filters.
- Drain pan: A 10–15 quart pan has enough capacity for most vehicles and leaves headroom to avoid spills.
- Funnels and spouts: A long, narrow funnel reaches tight filler necks; a wide-mouth funnel catches drains without splashback.
- Fluid transfer pump: By hand or electric, invaluable for differential, transmission, and power steering fluids where access is tight.
- Crush washers: Aluminum or copper washers on drain plugs are designed to deform once; replace them to prevent leaks.
Reliable numbers:
- Drain plug torque is commonly 20–35 ft-lb on many aluminum pans. Always check the spec; over-torquing strips pans.
- Typical oil fill volumes range from 4–6 quarts on many 4–6 cylinder engines; confirm your exact spec and compare what you drain to what you add.
How-to: a tidy, accurate oil change:
- Warm the engine slightly so oil drains faster and carries contaminants.
- Lift and secure the car on jack stands at the proper points; use wheel chocks.
- Position the drain pan to account for the stream’s initial distance and angle. Crack the plug slowly to avoid a sudden gush.
- Replace the crush washer and clean the area before reinstalling the plug, then torque properly.
- For canister filters, replace the O-ring and lightly oil it. Torque the cap to spec using the correct cup wrench.
- Refill with the right grade and volume, then start the engine and check for leaks. After a minute, shut down and recheck the level.
Used oil disposal:
- Most auto parts stores accept used oil and filters for free. Transport in clean, sealed containers. Record the mileage and date for maintenance logs.
Add-on tools worth it:
- Nitrile gloves protect your skin from solvents; shop towels and oil-absorbent pads keep the bay tidy.
- A fluid catch bottle with markings helps measure what you removed from a transmission or differential to guide refill amount.
Building Your Kit: Priorities, Budgets, and Upgrades
Putting together a top-ten toolkit is less about buying everything at once and more about buying smart and in the right order. Here’s how to build efficiently without compromising on safety or results.
Prioritize by impact:
- First buys: Socket and ratchet set, floor jack and stands, torque wrench. With these, you can safely do wheels, brakes, oil, and many engine bay jobs.
- Next up: OBD-II scanner and multimeter to diagnose before you wrench. Accurate diagnosis saves parts and time.
- Power and persuasion: Add the cordless impact and breaker bar/penetrant/heat combo for speed and seized hardware.
- Job expanders: Pliers/specialty grippers and brake service tools let you handle more complex tasks without frustration.
Budget tips:
- Buy once for safety: Jack stands, torque wrenches, and electrical meters are worth decent quality. Failure here is costly or dangerous.
- Mix tiers: A mid-tier socket set plus a pro-grade torque wrench is often better than all budget or all top-shelf.
- Battery platforms: If you already have a cordless drill ecosystem, consider that brand for your impact to share batteries and chargers.
Organization and productivity:
- Tool drawer organization saves hours. Foam cutouts or modular trays keep sockets and wrenches easy to grab—and easy to spot if missing.
- A magnetic parts tray and labeled zip bags for bolts from each subsystem (e.g., “LF caliper bracket bolts”) prevent guesswork at reassembly.
- Good lighting is a tool: A slim LED work light or headlamp reveals leaks, cracks, and misrouted hoses that a dim shop bulb won’t.
Upgrade paths:
- As you grow, consider a torque angle gauge for TTY bolts, a borescope to inspect cylinders and intake tracts, and a smoke machine (or DIY version) for vacuum leak detection.
- For frequent brake work, a pressure bleeder that fits your reservoir cap speeds up fluid flushes and yields consistent results.
How These Ten Tools Work Together on Real Jobs

The real power of a carefully chosen toolkit is the way each piece supports the others. Here are a few common jobs to show how these tools coordinate for speed, precision, and safety.
Brake pad and rotor replacement:
- Floor jack and stands secure the car. The cordless impact spins lug nuts off quickly; torque wrench ensures accurate lug torque on reassembly.
- Socket set removes caliper slide pins and brackets; the pliers set handles stubborn clips and spring hardware.
- Brake service tools compress the piston correctly, clean slides, and apply the right lubricant in the right place.
- Before a road test, check for ABS codes with the OBD-II scanner if the light is on, and confirm no new faults.
Intermittent battery drain:
- Multimeter checks resting battery voltage and alternator charge. After the sleep period, use the voltage-drop method across fuses to find a parasitic draw without pulling fuses and waking modules.
- OBD-II scanner verifies that modules sleep properly (readiness monitors can offer clues after a reset). Once the culprit circuit is found, pliers and trim tools help access connectors for further testing.
Suspension refresh (control arms, sway bar links):
- Cordless impact and breaker bar tackle large, rusted fasteners. Penetrating oil applied in advance saves time.
- Socket set with deep six-point sockets prevents rounding; torque wrench brings everything back to spec.
- Jack stands keep things stable while you work at full extension and reposition components safely.
Oil change with a stubborn filter:
- Oil and fluid service kit keeps mess to a minimum with a properly sized filter cup and wide drain pan.
- Pliers or a strap wrench handle the stuck filter—without crushing it into oblivion.
- Torque wrench sets the drain plug correctly; a small dab of oil on the new filter’s O-ring ensures easy removal next time.
Catalytic converter efficiency code (P0420):
- OBD-II scanner logs downstream O2 sensor data; you compare its steady output to the upstream sensor’s switching. If the downstream sensor mirrors upstream, the catalyst may be failing; if the sensor is flatlined, the sensor itself or wiring may be suspect.
- Multimeter checks heater circuit resistance and power/ground to the sensor; breaker bar and O2 socket remove the sensor for inspection or replacement.
Bringing it all together:
- These tools create a workflow: diagnose (scanner, multimeter), prepare and access (jack, stands, pliers, sockets), remove and install (impact, breaker bar), and verify (torque wrench, scanner, test drive).
A final word on safety and skill:
- Always cross-reference torque specs and procedures with a reliable repair manual or OEM service information. The right procedure turns good tools into professional results.
- Wear eye protection; gloves for chemicals; and hearing protection for impacts. Clear work areas prevent accidents and lost parts.
With these ten tools within arm’s reach, you’ll take on more of your car’s maintenance and repairs with confidence. Start with the essentials, add strategically, and practice solid techniques. You’ll save money, learn faster, and—best of all—enjoy the satisfaction of doing it right, safely, and repeatably.
Rate the Post
User Reviews
Other posts in Car Maintenance & Repairs


Popular Posts


