Why Motion Capture Is a GameChanger in Youth Sports
33 min read How motion capture transforms youth sports with data-driven coaching, injury prevention, and skill development, plus affordable tools, case studies, and tips for teams and parents. (0 Reviews)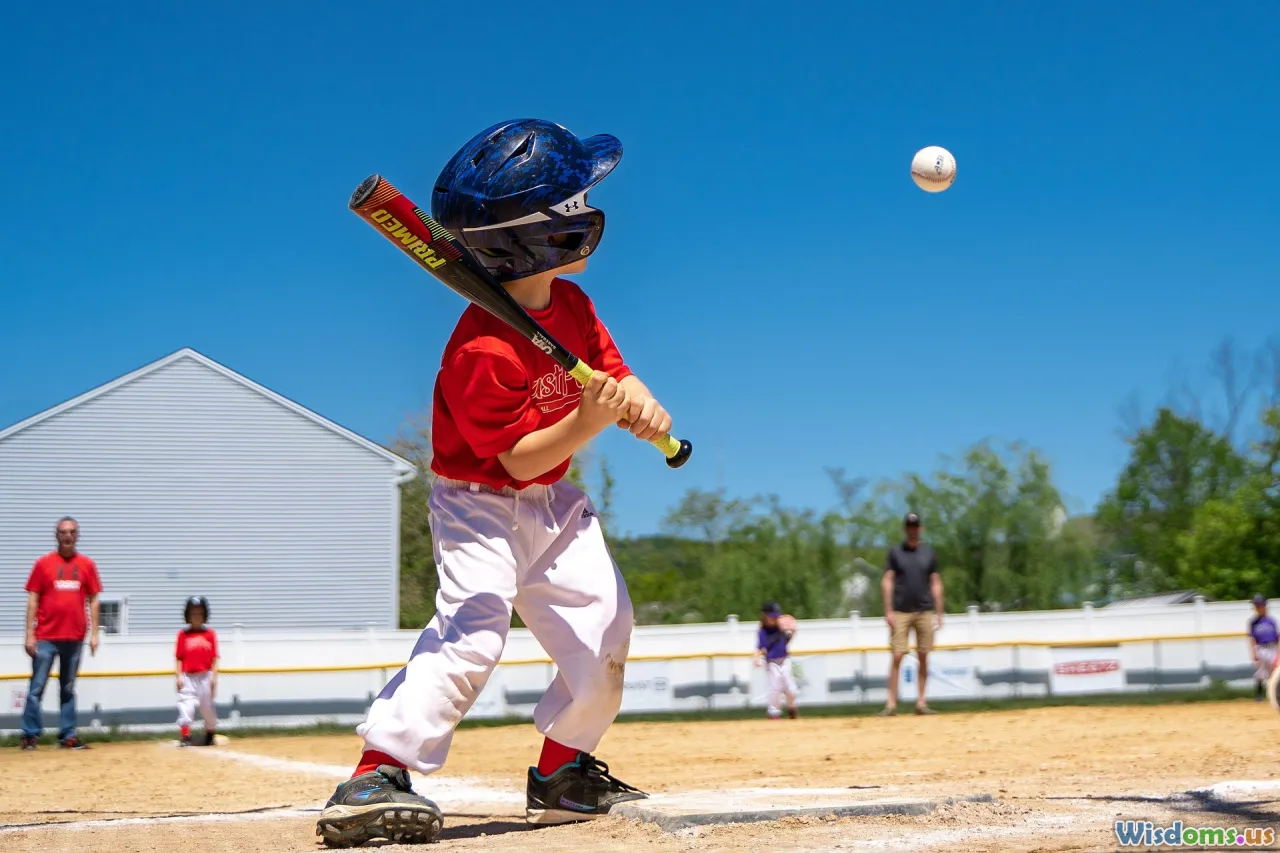
A few years ago, if a youth coach wanted to analyze movement, the options were slow‑motion video on a phone or an expensive biomechanics lab hours away. Today, a pair of smartphones and AI-powered software can quantify a young athlete’s sprint mechanics, cutting angles, and jump landings in minutes—no reflective markers, no lab coat required. For parents and coaches, that shift is more than convenient. It bridges the gap between “what you think you see” and “what actually happens,” transforming guesswork into guidance and helping kids train safer, learn faster, and enjoy sports longer.
What Motion Capture Really Means in Youth Sports

Motion capture (mocap) is the process of turning movement into data. In youth sports, that usually means tracking an athlete’s joint positions, angles, and velocities during a skill—like a soccer cut, a pitch, or a jump shot—and using the results to coach technique and manage risk.
There are a few common flavors of mocap relevant to youth teams:
- Markerless optical: Multiple cameras (often just smartphones) film the movement from different angles. AI estimates a 3D skeleton and derives joint angles and velocities. It’s low-cost, mobile, and now accurate enough for coaching and screening.
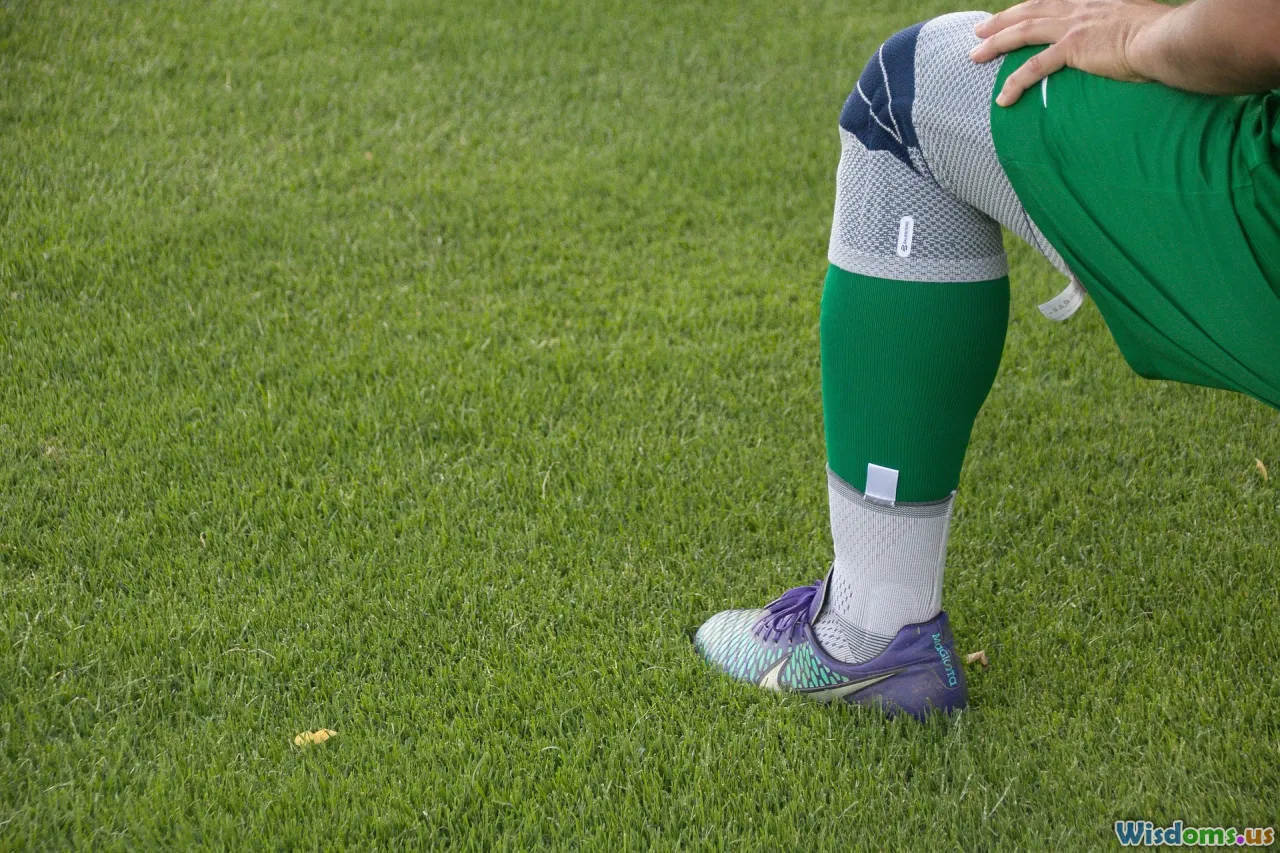
- Inertial Measurement Units (IMUs): Small wearable sensors with accelerometers and gyroscopes attach to body segments (e.g., shins, forearms, torso). They’re great outdoors and during live play, providing continuous data, even when cameras aren’t practical.
- Marker-based lab systems: The gold standard in biomechanics with reflective markers and multiple high-speed cameras. These are extremely accurate but expensive and best for periodic deep dives, not weekly practice.
How it works at a high level:
- Capture: Record the athlete from two or more angles (usually frontal and side) or attach IMUs to key segments.
- Reconstruction: Software estimates joint centers, limb segments, and the 3D path of movement.
- Measurement: The system computes metrics such as knee valgus angle, trunk lean, hip rotation speed, ground contact time, arm slot angle, or step length symmetry.
- Interpretation: Coaches and practitioners compare results to baselines, known safe ranges, or target technical models, then adapt practice and strength work accordingly.
The point isn’t to turn kids into robots. The point is to reveal patterns hidden to the naked eye—like a subtle inward knee collapse during cutting—that contribute to inefficient performance or injury risk and often go unnoticed until a problem appears.
Why It’s a Game-Changer Now, Not Ten Years Ago

Motion capture used to be a niche research tool. Today, three trends have brought it within reach of every youth program:
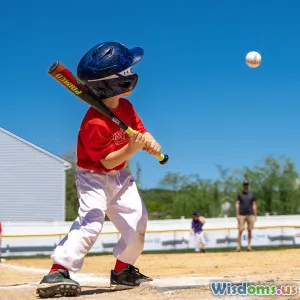
- Smartphone upgrades: Most current phones shoot at 120–240 frames per second with improved low-light capability and excellent stabilization. That’s fast enough to capture rapid movements like a baseball pitch or a volleyball spike.
- AI breakthroughs: Markerless pose estimation has improved dramatically. Algorithms now detect body landmarks reliably in varied environments—gyms, turf fields, pool decks—reducing the need for specialized labs.
- Lower costs and better UX: Cloud processing, intuitive apps, and consumer-grade tripods mean “set up and go” in five minutes or less. Many tools are priced monthly and per-team, often cheaper than a single tournament fee.
For youth sports, access matters. Most families and volunteer coaches don’t have the time or budget for specialized lab visits. Portable, phone-based mocap means you can capture an athlete at practice, in the context where they actually perform. That context—shoes, surface, fatigue, weather—matters more than a perfect lab environment when you’re trying to change behavior on the field.
The Science That Turns Videos Into Safer, Faster Kids

Mocap turns motion into measurable variables. The most common include:
- Joint angles and ranges of motion: Knee valgus/varus, trunk lean, hip internal/external rotation, shoulder abduction, spinal extension.
- Timing and rhythm: Ground contact time, flight time, stride duration, sequencing of body segments (e.g., pelvis rotation before trunk rotation during pitching).
- Speeds and accelerations: Angular velocities (how fast a joint rotates), segment speeds (e.g., forearm during a throw), and change-of-direction deceleration rates.
- Symmetry indices: Left-right differences in step length, contact time, or joint angles that can signal compensation or fatigue.
Why it matters in youth:
- The adolescent growth spurt changes body dimensions quickly. A 12-year-old can add several centimeters in height in a few months, altering balance and limb leverage. MoCap makes it clear when a previously clean landing pattern becomes unstable or when a newfound limb length requires technique adjustments.
- Fatigue and training load affect movement quality. Coaches often see performance drop at the end of games but can’t quantify it. With mocap, they can. A jump that starts symmetric at warm-up might show increased knee valgus after a long practice. The data supports smarter substitutions and recovery planning.
- Subtle technique issues can escalate. A slightly late trunk rotation during pitching isn’t just an aesthetic flaw—it can raise elbow torque. An inward knee collapse during a soccer cut isn’t just “messy”—it can be a precursor to knee pain or, in a worst case, ligament injury.
Research over the past two decades consistently shows that targeted neuromuscular training improves landing mechanics and can reduce lower-extremity injury risk in youth athletes. Motion capture brings precision to that training: you’re not just telling a kid to “land softer,” you’re demonstrating that their knee is tracking inward by 12 degrees at touchdown and showing visual feedback when it improves.
Injury Prevention You Can See
Injury prevention in youth sports often hinges on simple rules—respecting pitch counts, progressing workloads gradually, and teaching safe mechanics early. Motion capture strengthens those rules with measurable cues.
Four practical examples:
- Soccer/football ACL risk: Dynamic knee valgus (the knee caving inward) during jump landings and lateral cuts is a known risk factor. With mocap, a coach can quantify valgus angle and trunk lean during a standardized hop-and-cut drill. If valgus exceeds a team threshold (say, consistently over 10 degrees on the plant leg), the athlete trains hip control and landing technique, then re-tests. Visual progress keeps kids engaged while reducing risky patterns.
- Baseball pitching: Youth guidelines emphasize pitch counts and rest days. Motion capture adds specificity to mechanics—tracking stride length relative to body height, trunk tilt at ball release, and arm slot angle consistency. A 12U pitcher showing excessive trunk lean toward the glove side might be compensating for limited hip-shoulder separation, increasing elbow stress. Targeted mobility work and cueing can correct this before workloads rise.
- Basketball/volleyball jumping: Repeated jumping and landing is a recipe for patellar tendon irritation if mechanics are poor. MoCap quantifies knee and hip flexion at landing, showing whether the athlete is landing “stiff-legged.” A simple cue—“sit into your hips”—becomes powerful when the athlete sees knee flexion angle rise from 25 to 40 degrees post-coaching.
- Track sprinting: Asymmetry in ground contact time between legs is a common sign of compensation, fatigue, or an emerging issue. MoCap helps identify a meaningful difference (e.g., more than 5–7% over several trials), prompting strength or mobility work before a minor niggle becomes a strain.
Evidence-based programs combining strength, balance, and technique cues have been shown to lower ACL injury risk substantially in youth athletes. Motion capture doesn’t replace those programs—it makes them more precise by identifying which athletes need which exercises and confirming that practice actually changed the movement.
A practical 12-week process many teams can adopt:
- Weeks 1–2: Baseline capture for jump landings, cutting, and sprint starts. Identify top three movement priorities per athlete. Teach a 10–15 minute neuromuscular warm-up (squats, lunges, lateral hops with focus on knee tracking, single-leg balance, and hip control).
- Weeks 3–8: Micro-doses of technique work twice weekly. Re-capture key drills every two weeks to track progress. Use a simple red/yellow/green dashboard for each athlete to guide which kids need extra reps.
- Weeks 9–12: Consolidate changes, introduce sport-specific patterns (e.g., pressing or defending footwork in soccer, fastbreak footwork in basketball), and confirm that improvements hold under fatigue (test late in practice once or twice).
Performance Gains Kids Can Feel in Weeks
Young athletes don’t care about degrees of knee flexion—they care about beating a defender, hitting a personal best, or serving an ace. Motion capture turns technical coaching into tangible gains.
- Faster first step: In field sports, the first two strides often decide whether a player wins a loose ball. MoCap can reveal that an athlete’s shin angle at push-off is too upright or that the foot is striking in front of the center of mass, acting like a brake. A change in body lean and foot placement can cut 0.05–0.10 seconds off a 10-meter sprint—big in youth play.
- Sharper cuts: Measuring approach speed, plant foot position, and trunk angle during change-of-direction drills helps athletes find a balance between speed and control. Many kids learn to decelerate one step earlier and lower their center of mass, translating to fewer slips and faster exit speeds.
- Throwing velocity and accuracy: For baseball or softball pitchers, quantifying the timing of pelvis-first, trunk-second rotation and the stability of front-leg bracing often adds immediate velocity and better control. Even position players gain from tracking arm path and trunk posture on throws from the outfield.
- Better endurance under fatigue: Techniques that look good when fresh often degrade late in games. With periodic re-captures at the end of practice, you can identify who maintains mechanics and who needs conditioning that targets specific weaknesses.
The effect compounds. Technical improvements reduce wasted energy and lower injury risk, enabling more consistent training, which builds fitness and skill. For youth athletes, where consistency is everything, that feedback loop is a game-changer.
A Low-Cost Motion Capture Workflow for Youth Teams

You don’t need a lab. Here’s a practical setup many teams can implement in a single practice.
What you need:
- Two smartphones capable of 120–240 fps, fully charged
- Two inexpensive tripods or stable mounts at hip height
- Colored tape or chalk to mark lines and calibration points on the ground
- A measuring tape or meter stick for scale (helps some systems estimate distances)
- Optional: A few wearable IMUs for positions cameras can’t see well (under stadium lights, crowded sidelines)
Setup and capture (20 minutes, 10–12 athletes):
- Choose a space with decent lighting and a plain background if possible. Mark a 5–10 meter lane for sprints and a 3x3 meter area for jumps and cuts.
- Place one camera front-on and one at 45–90 degrees side-on, both about 3–5 meters away. Ensure they see the whole body throughout the movement.
- Warm up athletes as usual. Explain the drill and the cue: “Move like you play. This isn’t a test; it’s feedback.”
- Capture 2–3 reps per movement per athlete: a vertical jump and stick, a single-leg hop and stick, a 5–10 meter sprint, and a simple 45-degree cut off each foot.
- Process on-device or upload to the app. Many systems generate joint angles and timing within minutes.
- Tag clips by athlete and movement. Take quick notes: “Knee valgus left > right,” “Stride length short,” “Excessive trunk lean.”
Turnaround:
- Share one visual to each athlete right away—e.g., a freeze-frame comparing their knee alignment before and after a coaching cue. That single win engages kids more than a long lecture.
- Deliver a simple weekly summary to parents and players: three bullet points and one clip per athlete. Keep the message positive and actionable.
Markerless, IMU, or Lab? Choosing the Right Tool
Every tool has strengths. Choose based on your goals, budget, and environment.
Markerless (smartphones/tablets)
- Pros: Inexpensive, easy setup, good for technique coaching, visual feedback, and standardized tests. Works well for sprints, jumps, and skills like throwing.
- Cons: Occlusion can be an issue in crowded scenes; outdoor lighting and shadows can affect accuracy; less reliable for high-speed, complex motions if camera placement is poor.
- Ideal for: Most youth team sessions, pre-season screens, and periodic check-ins.
IMUs (wearable sensors)
- Pros: Great outdoors and during live play; robust to lighting; continuous capture over long sessions; good for contact time, step count, trunk rotation speed.
- Cons: Require proper placement; can be uncomfortable for some athletes; data interpretation can be less intuitive visually.
- Ideal for: Running gait during actual training, tracking workload and asymmetry across a season, discreet monitoring in tournaments.
Lab-based systems
- Pros: Highest accuracy; combine with force plates and EMG for deep analysis; best for complex questions or return-to-play decisions.
- Cons: Expensive and time-consuming; limited availability; not practical weekly.
- Ideal for: Periodic in-depth assessments, injury rehab benchmarks, or research partnerships.
For most youth programs, the best approach is layered: markerless for frequent technique work, IMUs for durational monitoring or away games, and an occasional lab referral for complex cases.
Reading the Numbers Without a PhD

You don’t need to become a biomechanist to use mocap effectively. Focus on a handful of metrics that map directly to coaching cues.
Useful, coach-friendly metrics:
- Knee-in vs. knee-over-toe alignment at landing or plant: Aim for tracking over the second/third toe, especially under load.
- Hip-knee-ankle line: A relatively straight line suggests adequate glute control and balance.
- Trunk angle: Excessive lateral lean during cuts may indicate a stability or strength issue.
- Step length and ground contact time: Look for big left/right differences (>5–7% across repeated trials) rather than chasing perfection on a single rep.
- Sequencing in throws: Pelvis rotation precedes trunk rotation; a delayed trunk or early arm suggests inefficiency.
How to make it digestible:
- Use a red/yellow/green system grounded in baselines for your team. If your average 12U athlete shows 5–8 degrees of valgus at landing, a consistent 12–15 degrees for a given athlete is a red flag to address, not a cause for panic.
- Always compare like with like: same drill, speed, and fatigue level. A cut at 70% effort isn’t the same as game pace.
- Don’t overreact to one frame. Look at the motion across time and across several reps.
- Tie each metric to one cue and one exercise. For example: “Excess trunk lean right during left-foot cuts” becomes “Cue: lower center of mass before plant; Exercise: lateral lunge to single-leg stick.”
How to Fit Motion Capture Into Practice Without Chaos

The biggest fear coaches have is time. Thankfully, mocap doesn’t have to hijack your session.
- Micro-dosing: Allocate 10–15 minutes at the start of practice once per week for capture. Rotate athletes through a station while others warm up or do technical work.
- Baseline and re-tests: Do a more thorough baseline in pre-season (20–30 minutes per athlete) and brief re-tests every 4–6 weeks.
- Role clarity: Assign a parent volunteer to handle setup and labeling, freeing coaches to cue and encourage.
- Game-like drills: Integrate measurement into drills kids already do—shuttle cuts, 1v1 closeouts, throw-downs to bases—so feedback is immediately relevant.
- Visual over verbal: Show a short clip and a single overlay (e.g., line of knee-to-toe). Many kids learn faster by seeing themselves than hearing long explanations.
Keep it kid-centered. Celebrate improvements publicly and deliver correction privately. Avoid jargon and frame feedback as a way to play more and hurt less.
Privacy, Consent, and Ethics for Working With Minors

Motion capture involves collecting images and sensitive data of minors. Treat it with the same care you would medical information.
Best practices:
- Obtain written consent from parents/guardians. Explain what you’ll record, why, where it will be stored, who can access it, and how long you’ll keep it.
- Minimize identifying information. Use athlete IDs rather than names on files where possible.
- Store securely. Use password-protected systems, avoid personal social media uploads, and restrict sharing to coaches, parents, and the athlete.
- Set a retention policy. Decide when videos will be deleted (e.g., end of season or after one year) unless parents ask for continued storage.
- Be mindful of attire and environment. Record in appropriate training clothing and avoid capturing unrelated individuals in the background.
- Respect opt-outs. If a family declines, offer alternative coaching and don’t penalize the athlete.
Good ethics build trust, and trust helps kids and parents embrace the process.
Real-World Snapshots: Three Quick Case Studies

These composites illustrate common scenarios and outcomes.
- U14 soccer academy (girls): Baseline hop-and-cut tests showed several athletes with pronounced knee valgus on the plant leg, especially when fatigued. Coaches added a 10-minute neuromuscular warm-up focusing on single-leg strength and landing control, plus weekly technique check-ins using markerless mocap. Over eight weeks, mocap data showed a 6–10 degree average reduction in peak valgus during cuts and fewer reports of knee soreness after tournaments. Performance-wise, the team’s transition defense improved because players could plant and redirect more confidently.
- 12U travel baseball pitchers: Coaches used side and front camera angles to quantify stride length, trunk tilt at ball release, and arm slot consistency. One pitcher with elbow discomfort showed late trunk rotation relative to arm acceleration. The plan added hip-shoulder separation drills, trunk rotation timing cues, and a modest workload adjustment. Within six weeks, elbow discomfort resolved, stride length improved from 80% to 90% of height, and velocity increased modestly while strike percentage went up—a sign of efficiency rather than simply throwing harder.
- Middle-school track program: A handful of athletes had recurring shin splints. IMUs revealed longer ground contact times and asymmetry late in runs. Coaches added short hill sprints for posture and foot placement practice, calf-soleus endurance work, and cadence targets. Subsequent tests showed improved symmetry and reduced contact times, and fewer athletes missed reps due to lower-leg pain.
These stories share a theme: use measurement to find the smallest meaningful change, practice it consistently, and watch the benefits ripple out to performance and confidence.
Common Pitfalls and How to Avoid Them

Even good tools can fail with poor execution. Avoid these missteps:
- Poor camera placement: If the camera is too close or too high, you’ll miss feet, hips, or shoulders at key moments. Aim for hip height, 3–5 meters away, and capture the whole body throughout the movement.
- Testing at unrealistic speeds: A slow-motion cut tells you little about game mechanics. Start slower for learning but collect at real speeds once the athlete is safe and confident.
- One-and-done mindset: A single recording is a snapshot. Use series comparisons—baseline, after coaching, under fatigue—to see true change.
- Over-coaching: Too many cues at once overwhelm kids. Prioritize one or two changes that unlock others.
- Chasing a one-size-fits-all model: Movement is personal, especially during growth spurts. Compare an athlete to their own baseline and safe ranges, not to a pro on social media.
- Ignoring growth phases: Monitor during peak height velocity. Mechanics may fluctuate temporarily; focus on safety and coordination before pushing high loads.
A good rule: clarity beats complexity. If you can’t explain the metric in one sentence and tie it to a drill, it’s probably not yet useful for your group.
What “Good” Looks Like: Sport-Specific Checklists
Use these quick-look checklists to link mocap to actionable coaching.
Baseball/Softball Pitching
- Pelvis rotates before trunk; trunk rotation peaks close to front-foot plant.
- Front-leg brace is firm at ball release; knee not collapsing forward excessively.
- Arm slot is consistent relative to trunk; avoid excessive trunk lean toward glove side.
- Stride length roughly 85–100% of height depending on age and style; consistent landing.
Soccer/Football Cutting
- Lower center of mass before plant; shin angle of plant leg aligns in the intended direction of travel.
- Knee tracks over toes with minimal inward collapse at peak force.
- Trunk leans slightly into the cut but remains controlled; head and eyes lead where you want to go.
- Quick, efficient penultimate step for deceleration before the plant.
Basketball/Volleyball Jumping and Landing
- Balanced two-foot takeoff with coordinated arm swing.
- Landing shows hip and knee flexion (“soft” landing), knees tracking over toes.
- Symmetric ground contact and quiet landings; avoid excessive heel slaps.
Track Sprint Start and Acceleration
- Body forms a straight line from ankle through head in first steps; shin angles progressive.
- Foot strikes under or slightly behind the center of mass to avoid braking.
- Arms drive rhythmically; no cross-body flailing that disrupts balance.
Swimming (Starts and Turns)
- Streamlined body position on entry; minimal knee valgus during block push-off.
- Powerful but controlled knee/hip extension on turns; feet placement symmetric on the wall.
Gymnastics (Basic Tumbling Landings)
- Feet shoulder-width, knees flex to absorb force, chest stays up.
- Minimal knee cave; controlled trunk position upon stick.
Use these as guidelines to frame coaching conversations, not rigid rules. When in doubt, ask: “Does this change make the athlete safer and more effective for their sport?”
Where It’s Headed: The Near Future of Youth MoCap

The next wave will make mocap even more user-friendly and valuable for youth programs:
- Real-time field feedback: On-device processing will allow instant overlays and metrics on a coach’s phone, complete with auto-cues.
- AR coaching: Glasses or phone overlays showing live joint angles or “green check” alignment during drills.
- Sensor fusion: Cameras, IMUs, GPS, and heart-rate monitors combined to contextualize mechanics with pace, fatigue, and workloads.
- Smart surfaces: Portable force-sensing mats and insoles quantifying ground reaction forces during team warm-ups.
- Personalized readiness alerts: Systems learning each athlete’s normal movement signature and flagging meaningful deviations after a growth spurt or intense game weekend.
The technology is moving toward invisibility: less setup, fewer clicks, more clear answers.
A closing thought: motion capture isn’t about making youth sports hyper-technical. It’s about making coaching more humane and effective. When you can show a young athlete precisely what’s happening in their body—and how a small change makes them faster, safer, or more confident—you shift the conversation from criticism to collaboration. That’s why it’s a game-changer.
If you’re a coach or parent starting out, begin small. Capture a jump and a cut. Pick one cue. Re-test in two weeks. Celebrate the win. As momentum builds, add sprints or sport-specific skills and bring in IMUs if needed. Keep the focus on joyful progress and shared problem-solving. The benefits will extend far beyond the screen and into every practice, game, and season ahead.
Rate the Post
User Reviews


Popular Posts


