
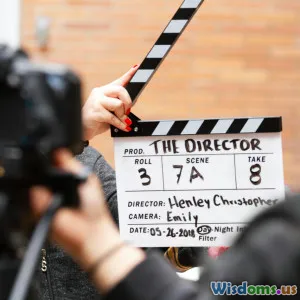
Creating realistic sets with forced perspective secrets
35 min read A strategist's guide to building convincing sets using forced perspective, covering scale, lenses, lighting, and staging, with actionable checklists, examples, and how to avoid common visual giveaways. (0 Reviews)
Every time an audience believes a cramped studio corner is a grand hall, or a cozy cottage table becomes a giant’s feast, someone on the crew has mastered forced perspective. This is the quiet magic of cinema and stagecraft: bending visual reality with geometry, texture, and planning so the camera sees what you want it to see. It’s not a gimmick any more than lighting is a gimmick; it’s a disciplined craft with rules you can learn, break, and refine.
Below is a practical guide to creating realistic sets with forced perspective—complete with math you can use on a call sheet, construction tips, and the production workflows that keep illusions solid under pressure.
What forced perspective really is—and why it works
Forced perspective exploits how our visual system and cameras infer depth from cues like parallax, relative size, convergence, and atmospheric falloff. The trick isn’t to eliminate these cues, but to choreograph them so they all agree with the same false reality.
- Relative size: A 20 cm prop closer to the camera can look identical in size to a 2 m object placed far away. If both fill the same proportion of the frame, the brain assumes they’re equal in scale.
- Convergence and horizon: Parallel lines converge toward the horizon at predictable angles. If you taper walls, floors, or rooftops along those angles, the shot reads as deeper than it is.
- Parallax: As the camera moves, near objects shift faster across frame than far ones. This is the Achilles’ heel of lazy forced perspective. Great illusions either lock the camera, pivot it around the lens’s entrance pupil (to cancel parallax), or build sets and rigs that “slide the cheat” as the camera moves so parallax still looks right.
- Atmospheric and texture cues: Fine textures and contrast drop off with distance in the natural world. If your “far” set elements are too sharp or too saturated, the illusion collapses.
Creatives have used these tricks for centuries. Renaissance painters called it trompe-l’œil. Architect Francesco Borromini built a famous forced-perspective corridor in Rome’s Palazzo Spada: roughly 8 meters long with a 60 cm statue at the end that reads as full-size from a fixed viewpoint. In theme parks, Disneyland’s Main Street, U.S.A. scales upper floors to roughly 5/8 and then 1/2 of ground floor size, making buildings feel taller without intimidating visitors. In film, the Bag End table scene in The Lord of the Rings turned a single dining room into a giant’s and a hobbit’s space simultaneously using a split-level, forced-perspective table.
The lesson: forced perspective is not a single trick; it’s a system that aligns camera, geometry, materials, and light.
The geometry: simple math that builds convincing illusions
At the heart of forced perspective is nothing more complex than similar triangles. If two objects subtend the same angle at the lens, they appear the same size on camera. That gives you a clean equation to size and position set pieces.
Key relationship (conceptual): size_on_sensor ∝ physical_size / distance_to_camera
Because angle and on-sensor size are proportional for small fields of view, you can treat it like a ratio problem:
- If you halve the distance, double the perceived size.
- If you want something to look half as big, either halve its physical size or double its distance (or some combination that keeps the angular size constant relative to a target).
Practical example: two chairs, one “giant,” one “hobbit”
- Your “giant” chair is 1.2 m wide. You place it 1.5 m from the lens.
- You want the “hobbit” chair, placed farther back, to look the same width on camera.
- Solve: chair_width_far / distance_far = chair_width_near / distance_near
So, distance_far = (chair_width_far / chair_width_near) × distance_near.
If the far chair is only 0.8 m wide (an underscaled prop you found cheap), then distance_far = (0.8 / 1.2) × 1.5 ≈ 1.0 m. But that places the smaller chair closer, which blows the illusion. Invert the plan: make the far chair larger than the near chair, or push it farther back.
Better: keep both at true size but stagger distance so their angular widths match. If both chairs are 1.2 m wide and the near one is at 1.5 m, set the far one at 3.0 m for a 1:2 distance ratio. They’ll render the same width on camera. Then cheat height and eyelines to sell that one is dwarfing a smaller character.
Actor height ratios with distance
- You have a 1.85 m actor (Actor A) and a 1.60 m actor (Actor B). You want A to read as 30% taller than B without prosthetics.
- Desired on-screen size ratio s = 1.30.
- Keep A and B at normal size; control the ratio via distance: angular_size ∝ 1 / distance. For A to look 1.30× B, put A at distance dA and B at distance dB such that dB ≈ 1.30 × dA.
If A stands at 1.8 m from camera, place B at ≈ 2.34 m. Now tweak floor elevation and lens height for eye-level plausibility. This is exactly the kind of subtle cheat used at dining tables: one actor sits closer to cam and on a slightly higher chair; the other sits further back with a lower seat. The shared tabletop is cut on a diagonal so edges still align from the lens.
Set tapering with vanishing point
- Draw your camera’s eye-line and choose a horizon height. Taper walls and floors so their edges “aim” at that distant vanishing point.
- If a hallway is 4 m long but you need it to read as 12 m, taper wall spacing by a factor of 1/3 over distance. A 3 m width at the camera end can shrink to 1 m at the back wall. The baseboards, tile lines, and ceiling beams must shrink consistently, or the viewer will catch the cheat.
Rule-of-thumb cheats you can jot on a corner of the script
- To double perceived depth, shrink texture scale by half toward the back and lower contrast by 25–30%.
- A 10–15% taper in repeated patterns per “depth segment” is noticeable but not jarring. Anything past 30% per segment risks detection unless the pattern is highly irregular.
- Keep a master ratio sheet: all recurring features (brick height, board width, lamp size) should follow the same distance-to-scale function.
Choosing the right lens and camera position

Perspective is governed by camera position, not focal length, but the lens you pick changes how forgiving the illusion is.
- Wide lenses (e.g., 18–24 mm on full-frame): Exaggerate perspective and make distance cheats more obvious. They also reveal more of the set, increasing the chance of seeing the taper.
- Normal to short telephoto (e.g., 35–85 mm): Compresses space gently, helpful for blending scaled elements. Longer lenses reduce the rate of parallax change, which buys you a little grace.
- Field-of-view references (approximate, full-frame): 24 mm gives ~84° diagonal FOV; 50 mm ~46°; 85 mm ~28°. Tighter FOV means fewer edge giveaways.
Entrance pupil and parallax
If you pan from a tripod head, the camera rotates around a point behind the lens mount, causing foreground and background to shift relative to each other. For static forced perspective, that can break the alignment. Use a panoramic or nodal rail to rotate around the lens’s entrance pupil (often miscalled the nodal point). This keeps the perspective relationship constant as you pan.
Depth of field and focus strategy
- Too much sharpness reveals scale discrepancies in textures; too little sharpness makes the illusion feel muddy.
- Stop down to f/8–f/11 on most cinema lenses for a controlled depth-of-field that holds near and far heroes, then use haze or selective diffusion (nets, Black Pro-Mist) to soften distant elements gently.
- Hyperfocal thinking helps: for a 50 mm at f/8 on full-frame, hyperfocal is around 10 m with a typical circle of confusion. If you focus near that, everything from about 5 m to infinity is acceptably sharp. That can be useful when your near subject is at 4–5 m and your background cheat is much farther.
Camera height
Match the camera’s lens height to the eye level of your “truth.” If the shot promises a 1.7 m tall viewer, keep the lens center near that height unless story dictates otherwise. It stabilizes vanishing lines and makes tapering feel natural.
Building the set: materials, textures, and paint tricks
Materials can betray scale faster than geometry. Realism lives in edge behavior, texture frequency, and how light wraps.
- Texture frequency: Coarse grain on a “distant” door reads fake. As you taper size, also scale down texture patterns: smaller brick faces, tighter wood grain, finer fabric weave.
- Edge rounding: Things farther away appear slightly softer at edges. A tiny radius sanded into the far-end trim, combined with paint feathering, can imply distance.
- Paint techniques that sell depth:
- Glazing: Thin, translucent layers add atmospheric haze to “far” surfaces.
- Dry brushing: Catches highlights on texture for “near” features; avoid on scaled-down back walls.
- Scumbling: Breaks up large areas with subtle variation so they don’t look like freshly painted flats.
- Color strategy: Cooler, desaturated tones in the distance, warmer near the lens. Even a 300–800 K color-temperature shift in practicals can create depth.
- Material swaps: Use lighter materials for “far” elements to keep construction easy—foam, vac-formed plastic, thin MDF. Near elements can be denser because they carry close-up scrutiny.
Specific build example: a tapered town street
- Street width: 6 m at the near end, tapering to 2.5 m over a 10 m depth.
- Building facades: First 4 m use full-scale brick (e.g., 7.5 cm height). Then transition to 6.5 cm, then 5.5 cm bricks as you move back.
- Window scaling: First row standard 1.0×, mid 0.85×, far 0.7×. Keep sill heights consistent along a line that matches your eye-level/horizon.
- Set dress: Trash bins, planters, and signage also scale down. Use fewer layers of dirt toward the back to simulate cleaner air and less foot traffic—counterintuitive, but it stops the back from feeling noisy.
Safety note: Tapered walkways and steps are trip hazards. Build handrails labeled for crew only, paint edge marks just out of frame, and rehearse actor paths with tape and cue lights.
Lighting that sells the depth

Lighting can multiply or murder your illusion. The inverse-square law means light intensity falls off fast with distance. In a forced-perspective set, your “distance” may be 3 meters, not 30. You must cheat falloff and directionality.
- Direction consistency: Keep primary key direction consistent across scaled elements. If the near lamppost shadows left, the far one must also shadow left at the same angle. A 10–15° mismatch is enough to look off.
- Gradation: Gently lower exposure toward the back. One stop of falloff across the set can imply atmospheric depth without snuffing detail.
- Contrast and diffusion: Add a touch of haze to reduce contrast with distance. Use a hazer, not a smoke machine; you want even particulate, not clouds.
- Color temperature: Warm foreground practicals (e.g., 2900–3200 K) and slightly cooler backlights (e.g., 3800–4200 K) fake aerial perspective. In daylight scenes, bounce more blue into the back.
- Gobos and cookies: Break up backlight with subtle leaf patterns or window gobos to suggest space beyond the set.
- Specular control: Shiny surfaces betray scale and parallax. Dull them with matte spray or dulling powder. Specular highlights carry hard cues about object curvature and distance.
Quick lighting setup for a night alley
- Key: Softbox at camera left, elevated, skimming the near wall to bring out texture.
- Back practicals: Staggered “sodium vapor” fixtures, each slightly dimmer and bluer as they recede.
- Edge light: Hard backlight from high right to separate silhouettes. Add a kicker on the near trash bin only.
- Atmospheric layer: Constant low haze; flag the front light so haze glows more in the distance than near.
Planning a forced-perspective shot: a step-by-step workflow
- Define the illusion
- Write a one-sentence truth: “The hero looks two heads taller than the sidekick at the table,” or “The corridor reads as 20 m deep.” This anchors every choice.
- Choose the lens and the frame early
- Pick focal length and camera height first. Sketch the frame lines on a floor plan with a 3D previz or even a cardboard diorama.
- Lock the eye point
- Mark the lens center in space: height from floor and depth from a fixed set datum. Decisions flow from this.
- Draft with similar triangles
- Using your lens and frame, compute positions and scales. Build a simple spreadsheet: enter near size and distance; receive far size and distance. Include a column for texture scale.
- Build mock-ups
- Tape on the floor, foamcore walls, and paper textures. Walk the camera through planned moves. Identify seams and sightline betrayals.
- Eyeline and blocking
- Determine where actors must look to “meet eyes.” This usually means marks on the set at different depths. Record eyeline notes on the sides.
- Dress progressively
- Start with near hero props. Add mid-ground, then the far background. Keep back elements low-contrast until camera demands more.
- Light in layers
- Begin with backlight and practicals; add key and fill last. Check shadow angle continuity.
- Test, record, adjust
- Roll on rehearsal. Watch on a calibrated monitor. Nudge set pieces by centimeters; tiny changes have outsized effects.
- Lock and protect
- Once the shot works, lock off positions. Photograph the set with a measuring tape in frame at key spots. Label all risers and tapers for continuity.
Moving camera and actors without breaking the illusion

Static shots are the easiest. But you can move the camera if you respect parallax.
- Pivot around the entrance pupil: Use a nodal slide on a fluid head to pan/tilt with minimal parallax change. This keeps alignments intact.
- Dolly along the axis: Moves directly toward or away from the vanishing point are more forgiving because relative lateral motion is minimized. Keep the dolly track centered on the camera’s line-of-sight.
- Arc moves with synchronized set elements: If you must arc, couple a sliding set piece to the dolly so its lateral shift offsets parallax. Weta Workshop famously built a motorized, split table for Bag End so Gandalf and Bilbo’s relative scale held as the camera floated. One half of the table moved independently to preserve the forced geometry.
- Actor motion on tapered floors: Put the “small” character on a slightly lower, farther run, and the “large” character on a higher, closer run. Their footsteps are at different elevations but must land on beats. Mark shoe placement with low-profile felt markers.
- Eyeline rigs: A lightweight perch or laser dot on a stand behind camera can anchor eyelines when the partner is offset in depth.
- Motion control: For repeatable takes, a simple two-axis motion-control slider can keep camera path and speed consistent while you fine-tune set shifts.
Tip: Preprogram a stop at the “sweet spot.” Many illusions have a perfect distance. Hit that mark dramatically and avoid dwelling where the cheat is most fragile.
Anamorphic and curved sets for extreme illusions
When the illusion must be seen from one exact viewpoint, anamorphic sets and curved builds unlock extremes.
- Ames room: A classic display where a rectangular room is actually a trapezoid; floor, ceiling, and windows are skewed. From a specific peephole, it looks normal but people walking left-to-right appear to grow or shrink. Translate this logic into sets when you need wild scale shifts that still feel architectural.
- Curved corridors: Rather than straight tapering, build a subtle curve that keeps the end wall facing the lens. Textures and sconces follow the curve’s math, not straight lines, which helps hide corner seams.
- Anamorphic floor graphics: Paint tiles or rugs whose pattern scales nonlinearly toward the back. From the lens, the pattern squares read uniform; from the side, they’re long trapezoids. Create templates in a DCC tool, project them onto your floor mesh from the lens position, then print full-size stencils for paint.
Build method for an anamorphic hallway
- Previze the set in 3D from the camera’s exact position.
- Project the “ideal” hallway texture from that camera onto your actual, space-saving tapered model.
- Export UV-like paint maps for walls and floor.
- On stage, grid the surfaces and transfer the patterns with a projector or printed stencils.
- Paint value and color gradients right into the map so lighting has to do less heavy lifting.
Note: Anamorphic illusions are brittle with moving cameras. Design moves that stay close to the calibrated viewpoint—small push-ins or tilts—rather than wide lateral moves.
Case studies you can learn from
-
The Lord of the Rings: Bag End table
- Problem: Ian McKellen (Gandalf) and Elijah Wood (Frodo) must share a table while appearing vastly different in scale.
- Solution: A split, forced-perspective table with Gandalf’s half larger and closer to camera, Frodo’s half smaller and farther. Plates and props were glued in place at odd sizes but aligned from the lens. A motorized rig allowed subtle camera movement while preserving geometry, a technique sometimes called sliding forced perspective.
- Takeaway: Commit to one hero viewpoint and engineer props to that sightline. Accept that the tabletop will look bizarre from the side; only the lens matters.
-
Disneyland’s Main Street, U.S.A.
- Problem: Make buildings feel tall and majestic but friendly.
- Solution: Ground floors near full scale, second stories around 5/8, third stories around 1/2, with window and cornice details scaled down accordingly. Color saturation and contrast drop with each story.
- Takeaway: Audiences accept graded scale if transitions are consistent and architectural rhythms are preserved.
-
Palazzo Spada’s Borromini corridor
- Problem: Deliver the sensation of a deep colonnade in a compact space.
- Solution: Columns and floor tiles shrink along the corridor; floor ramps upward slightly. From the vantage point, the 8–9 m space reads as four times longer, and a 60 cm statue appears life-size.
- Takeaway: Small vertical cheats (raised floors) plus aggressive pattern scaling make powerful illusions in architectural contexts.
-
Music videos and commercials
- Michel Gondry often blends live-action and forced perspective (e.g., oversized furniture, tapered sets) to delight rather than fool. The value here is embracing the set’s strangeness while still aligning key sightlines.
- Takeaway: You can design the illusion to be readable as an illusion when that serves the tone. The same math applies.
Budgeting and scheduling for forced perspective
Forced perspective can be cheaper than CG, but only if you respect its prep needs.
- Preproduction: Expect 1–2 days of design and previz per complex shot, even if the physical build is modest. Pencil tests save money.
- Materials: Tapered builds often use less material overall. But specialized textures (multiple brick sizes, custom stencils) add cost.
- Labor: You’ll need an art director who understands geometry, a scenic artist for paint tricks, and a gaffer who coordinates gradation and color.
- On-set time: Allocate 2–4 hours for final alignment and lighting on simple illusions; a day or more for complex moving-camera rigs.
- Contingency: Budget 10–15% for last-minute risers, wedges, and alternate props at slightly different scales.
Cost comparison sketch for a single hero shot
- All-CG extension: Potentially less on-set time, but heavy post; good if your background needs dynamic depth beyond a fixed camera.
- In-camera forced perspective: Higher prep and art build, lower post, gives immediate results for performance.
- Hybrid: Build near to mid-ground forced perspective; add digital matte for distant skyline. Often the best of both worlds.
Tip: Reuse tapered flats by painting neutral on the backside. With new skins and signage, your “pinched alley” becomes a “shrinking museum hall.”
Common mistakes and how to fix them fast
-
Misaligned horizon
- Symptom: Taper looks like a slanted set, not depth.
- Fix: Match camera height to eye level, re-aim floor and chair lines at the same vanishing point. Move the camera, not just the set.
-
Texture giveaway
- Symptom: Back wall bricks look the same size as front ones; distance feels wrong.
- Fix: Downscale brick height and mortar width; add a layer of glaze to reduce contrast.
-
Lighting inconsistency
- Symptom: Shadows at the back fall in a different direction.
- Fix: Track key light vector. Use a laser pointer to mark angle and elevation. Adjust practicals to match.
-
Reflections exposing scale
- Symptom: A “small” metal prop has giant, near-field reflections.
- Fix: Dull it or flag bright sources; swap for painted resin with semi-matte clearcoat.
-
DOF mismatch
- Symptom: Near and far heroes both tack-sharp at f/2; world feels miniaturized.
- Fix: Stop down or add haze; sometimes diffusion on the back half only.
-
Parallax bust on a pan
- Symptom: As you pan, edges slide out of alignment.
- Fix: Rotate around entrance pupil; reduce pan amplitude; or design an arc with moving set elements.
-
Eyeline drift
- Symptom: Actors seem to look past each other.
- Fix: Place numbered dots for each actor’s gaze. Rehearse with callouts (“Look 2, now 3”). Move dots, not performance.
-
Sound scuff giveaways
- Symptom: Footsteps reveal that one actor is on a ramp.
- Fix: Pad and carpet runner under the ramp; ADR safety if needed.
Quick formulas, checklists, and templates you can steal
Formulas you’ll actually use
- Scale–distance equivalence: perceived_size ∝ physical_size / distance. If you change physical scale by factor k, change distance by the same factor k to keep perceived size constant.
- Taper percentage per meter: If a corridor must shrink from width W0 at camera to W1 at distance D, the per-meter taper is (W0 − W1) / D. Aim for smooth, not stepwise, changes.
- Eyeline height: For seated actors at different depths to share eyeline, raise the back chair roughly by the ratio of distance difference times the lens’s vertical FOV fraction. Start with 2–5 cm and adjust by monitor.
Pre-shoot checklist
- Lens chosen, entrance pupil marked, camera height locked
- Floor plan with vanishing lines printed and taped on set
- Texture scale chart for paint/scenic crew
- Alternate-scale hero props ready (±10–15%)
- Haze plan approved; fans and returns placed
- Eyeline dots and marks prepped and labeled
- Safety review of tapered floors and steps
- Continuity photos with tape measures at key points
On-the-day adjustments
- Haze test: roll; check the back reads softer than front
- Shadow check: verify direction at both near and far ends
- Focus pulls: rehearse with a stand-in at the far mark; adjust f-stop to keep both heroes sellable
- Movement rehearsal: run the dolly; watch for parallax busts and wobble; lock it
Templates and tools
- Spreadsheet: Tabs for lens/FOV, distance-to-scale, texture scaling per meter. Include printouts for the art department.
- Cardboard diorama: A quick 1:20 model with the camera viewpoint marked. Useful for scouting illusions at the desk.
- Cheap laser measure: For instant distance checks as you nudge set pieces.
- Chalk line and colored tape: For drawing vanishing lines and eyeline marks on set.
A mini how-to for a one-day forced-perspective table scene
- Morning: Pre-rig a split tabletop; one half 1.25× scale, the other 0.85×. Paint and distress separately.
- Midday: Block actors with chairs at slightly different heights; set eyeline dots on C-stands.
- Afternoon: Light with a high soft key and matching practicals; haze lightly; stop down to f/8.
- Final: Rehearse slate-to-wrap with a tiny push-in on a slider. Adjust the table halves by centimeters until the lip lines up.
Good illusions end quietly. The camera sees a world that obeys its own laws of depth, and the audience leans in without knowing why. That’s your goal: not to shout, “Look at this trick,” but to let geometry, paint, and light collaborate so the story feels bigger than the stage. Practice on a tabletop, graduate to a corridor, then take on a town square. The math stays the same; your command of it grows. And once you’ve learned to make three meters look like thirty, you’ll start planning shots with a new kind of freedom—the freedom that comes from deciding what reality means to the lens.
Rate the Post
User Reviews

Popular Posts


