Step By Step Guide to Shooting Night Scenes Creatively
8 min read Master creative night scene shooting with expert tips on lighting, exposure, composition, and equipment choices to elevate your nighttime visuals. (0 Reviews)
Step By Step Guide to Shooting Night Scenes Creatively
Night photography and videography unlock artistic possibilities that daylight simply can't match. From neon-lit cityscapes to tranquil starry skies, capturing the allure of night scenes challenges your technical skills as well as your creativity. But with the right approach, equipment, and mindset, you can produce breathtaking, atmospheric visuals that captivate viewers and convey deep mood and narrative.
This guide provides a detailed, actionable roadmap for shooting night scenes creatively—whether you're a photographer striving for stunning stills or a filmmaker seeking cinematic magic. You'll learn how to master exposure settings, harness ambient and artificial light, design compelling compositions, and leverage post-production effectively.
Why Night Scenes Are Unique and Challenging
Night scenes offer stunning contrasts, vibrant artificial lights, long reflections, and dramatic shadows. However, they demand overcoming low-light constraints, managing noise, and achieving precise focus.
- Low Light Conditions: The lack of ambient natural light forces you to adjust exposure with slower shutter speeds or wider apertures, increasing risks of blur.
- Noise Management: Higher ISO settings to boost sensitivity often introduce grain, which can degrade image quality.
- Manual Controls Required: Autofocus systems may struggle in dark environments, necessitating manual focusing.
Yet, these challenges invite creative experimentation that daylight shots rarely permit. For instance, slow shutter speeds transform moving car lights into dynamic streaks, and urban neon signs become vivid color sources that paint striking silhouettes and reflections.
Step 1: Planning Your Night Shoot
Proper preparation is the foundation of success. Consider these elements:
Choose Your Location Carefully
- Urban environments with diverse lighting: neon signs, street lamps, traffic trails.
- Natural settings: moonlit landscapes, starry skies, light painting opportunities.
For example, Tokyo’s Shinjuku district pulses with neon intensity, perfect for vibrant, dynamic cityscapes; while rural locations away from light pollution offer ideal conditions for astrophotography.
Scout the Location in Advance
Visit during the day to:
- Identify compelling compositions.
- Test lighting scenarios.
- Note obstacles or hazards.
Time Your Shoot
- The "blue hour" (twilight) offers balanced natural and artificial light, often easiest to work with.
- Moon phase impacts natural light; full moons provide gentle landscape illumination.
Equipment Checklist
- Sturdy tripod for stable long exposures.
- Fast prime lenses with wide apertures (f/1.2, f/1.4, f/1.8).
- Remote shutter release or intervalometer to prevent camera shake.
- Extra batteries (cold weather often drains power faster).
Step 2: Camera Settings for Night Scenes
Use Manual Mode
Control over aperture, shutter speed, and ISO is essential.
Aperture
- Use wide apertures (low f-stop values) to maximize light.
- However, consider depth of field: very wide apertures yield shallow DOF. Example: f/1.4 for portraits at night; f/5.6 if you want more in focus.
Shutter Speed
- Longer exposures (several seconds) for light trails, dim scenes.
- Shorter exposures for freezing motion. For steady shots, use a shutter speed too slow for handheld—invariably leading to tripod use.
Example: A 30-second exposure beautifully captures star trails.
ISO
- Keep as low as possible to minimize noise.
- Modern cameras handle ISO 3200 or 6400 well, but test your gear.
White Balance
- Auto white balance may struggle under mixed lighting.
- Adjust manually or shoot in RAW for flexible post-processing.
Focus
- Autofocus struggles; switch to manual focus.
- Use focus peaking (live view) or focus magnification.
- Focus on bright objects or use flashlight for assistance.
Step 3: Lighting Techniques
Utilize Existing Light Sources
- Consider streetlights, passing cars, shop windows.
- Example: Photographing a wet street after rain magnifies reflections and colors.
Add Creative Lighting
- Use portable LED lights, gels, or light painting techniques.
Light Painting
- Move a flashlight or colored light sources during long exposures to "paint" subjects or create dynamic effects.
- For instance, photographer Michael Kenna frequently employs light painting to add surreal highlights to tranquil night landscapes.
Step 4: Composition Strategies to Enhance Night Shots
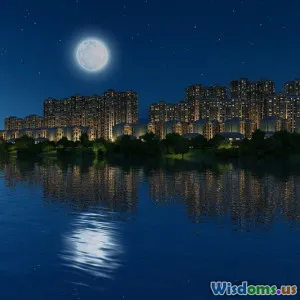
Leverage Leading Lines and Reflections
- Roads, rails, and sidewalk lines direct views into the frame.
- Wet surfaces and puddles create mirror-like reflections, enriching textures.
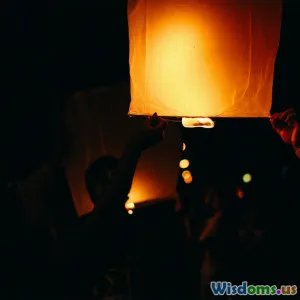
Incorporate Human Elements
- Silhouetted pedestrians, traffic, or figures holding light sources add narrative layers.
Play with Contrast and Shadows
- High-contrast scenes emphasize mood; isolate lit areas against deep shadows.
Contextualize With Foreground and Background
- Include elements adding depth.
- Frame a brightly lit building in the background with silhouetted trees in the foreground.
Step 5: Post-Processing Night Images
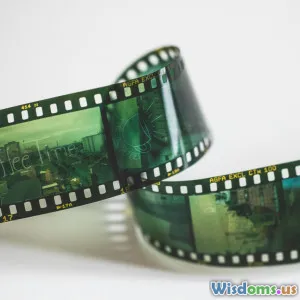
Use RAW Files
Retaining maximum data allows significant exposure and white balance adjustments with minimal quality loss.
Noise Reduction
- Use specialized software like Adobe Lightroom or DxO PureRAW.
- Balancing noise reduction and detail is key.
Contrast and Color Grading
- Enhance vibrancy without oversaturation.
- Apply slight tonal curves to deepen blacks.
Highlight Recovery
- Preserve neon lights without blowing out highlights.
Real-World Examples and Insights
Example 1: Cityscape Long Exposure
Photographer Trey Ratcliff is known for his long-exposure night city shots, capturing light trails and reflections. He recommends using bulb mode for exposures longer than 30 seconds and experimenting with different shutter speeds for unique effects.
Example 2: Astrophotography
NASA astrophotographers suggest capturing star fields with 15-30 second exposures, high ISO, and wide apertures while tracking with a motorized mount to avoid star trails.
Practical Tip
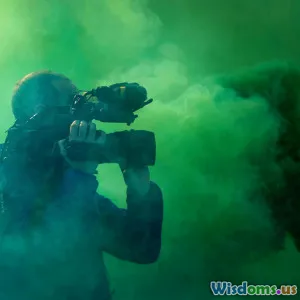
American Cinematographer magazine highlights that filmmakers often supplement ambient light with subtle LED panels to maintain natural shadows while illuminating faces during night scenes.
Conclusion
Shooting night scenes creatively is a rewarding endeavor that blends technical mastery with artistic vision. By carefully planning locations and timing, mastering manual camera settings, leveraging light creatively, composing thoughtfully, and fine-tuning post-production, you unlock extraordinary visual stories hidden in darkness.
Practice patience and embrace experimentation—each night shoot unveils new visual opportunities and deepens your understanding of light and shadow. Go out with your gear, explore diverse environments, and illuminate the night with your creativity.
Are you ready to bring your night scenes to life? Grab your camera, embrace the night, and start experimenting today!
Rate the Post
User Reviews

Popular Posts


