How to Master Light Trails in Busy Urban Centers
9 min read Unlock the secrets of capturing stunning light trails in bustling cities with expert tips on gear, technique, and creative composition. (0 Reviews)
How to Master Light Trails in Busy Urban Centers
Photography enthusiasts and professionals alike are captivated by the mesmerizing effects that light trails add to urban landscapes. These streaks of light—tracing the movement of cars, trams, and bustling nightlife—bring an ethereal, dynamic quality to city scenes that few other techniques can match. But in the energetic and visually complex environments of busy urban centers, mastering light trail photography requires more than just pointing your camera at moving lights. It calls for precise settings, a deep understanding of your environment, and a creative eye.
In this in-depth guide, we'll explore everything you need to know about capturing stunning light trails in urban environments—from essential equipment and technical settings to composition strategies and real-world examples.
Understanding Light Trails: What They Are and Why They Work
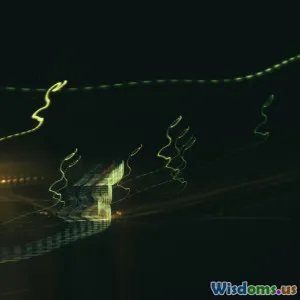
Light trails occur when a camera’s shutter remains open long enough to record the passage of light sources as continuous lines instead of static dots. This long-exposure effect transforms moving lights—cars, bikes, trains, even pedestrians with smartphone screens—into dynamic, flowing streaks that convey motion and energy.
Busy urban centers, with their dense and varied sources of artificial light, such as vehicle headlights and neon signs, provide fertile ground for creating dramatic light trails. Cities like New York, Tokyo, or Paris can especially inspire photographers to exploit the contrast between vibrant movement and stationary urban architecture.
Preparing to Shoot: Gear and Setup
Camera
A camera capable of manual exposure control is essential. DSLRs and mirrorless cameras are ideal because of their superior low-light performance and full control over shutter speed, aperture, and ISO.
Tripod
Since capturing light trails requires long exposure times—sometimes stretching up to 30 seconds or more—stability is crucial. A robust tripod will prevent camera shake, ensuring crisp, clean light trails instead of blurry messes.
Remote Shutter or Timer
Pressing the shutter button manually can introduce shake. Remote shutters or the camera’s built-in timer function help minimize this by triggering the exposure without physical contact.
Lens Choices
Wide-angle lenses work well in urban settings, capturing expansive scenes of streets and buildings alongside light trails. However, experimenting with telephoto lenses allows focusing on specific light paths, creating abstract or compressed perspectives.
Technical Settings for Capturing Perfect Light Trails
1. Shutter Speed
Long exposure is a must. Start with a shutter speed between 10 to 30 seconds to capture continuous light movement. The exact duration depends on factors like traffic speed, density, and ambient light.
2. Aperture
Choosing an aperture between f/8 and f/16 generally achieves a balance of depth of field and image sharpness. A narrower aperture also helps compensate for the prolonged exposure by limiting light entry.
3. ISO
Keep ISO low (100–400) to reduce image noise, which is particularly noticeable in night photography.
4. Focus
Manual focus is recommended. Autofocus may struggle in low light; pre-focus on static points where light trails are expected, like an intersection or a specific part of the road.
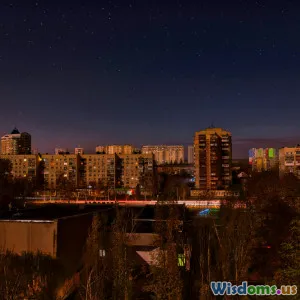
Choosing the Right Location and Timing
Urban Hotspots
Seek locations with heavy, steady flow of lights such as major intersections, highways, or popular streets lined with traffic. Elevated viewpoints—rooftops, pedestrian bridges, or balconies—can provide stunning vantage points.
Timing
The best time to shoot light trails is during the blue hour (shortly after sunset or before sunrise), when there's enough ambient light in the sky to give your images context without overpowering the light trails. However, shooting later at night can lend more dramatic contrasts.
Understanding Traffic Flow
Observe peak and lull times for traffic or public transport to fine-tune your exposure length and capture optimal density in light patterns.
Creative Composition Ideas
Leading Lines
Use the light trails as leading lines directing the viewer’s eye through the photograph. Curved roads, roundabouts, or tunnels can produce fascinating light patterns.
Layering with Urban Elements
Integrate stationary urban elements such as lampposts, pedestrians, or buildings to contrast the dynamic trails, creating depth and context.
Color Contrast
City light trails often contain varying colors—white from headlights, red from taillights, and sometimes green or yellow from streetlights. Utilize these colors for dramatic contrast and mood.
Incorporate Reflection
Wet pavement or nearby bodies of water doubles the effect by reflecting light trails, amplifying the visual impact.
Troubleshooting Common Challenges
Excessive Exposure
Problem: Image is too bright or washed out.
Solution: Use a smaller aperture and/or lower ISO. Also, try reducing shutter speed or using a neutral density filter to limit light intake.
Camera Shake
Problem: Trails and background are blurry.
Solution: Secure your tripod on solid ground, use remote shutter release or timer, and avoid windy conditions.
Overcrowded Trails
Problem: Light streaks look messy or entangled.
Solution: Shorten exposure times or choose less busy locations during moderate traffic.
Fog or Haze
Problem: Reduced clarity and contrast.
Solution: Embrace the atmospheric effect creatively or wait for clearer conditions depending on your artistic intent.
Real-World Insights: Case Studies from Renowned Urban Photographers
Timelapse Artist James Turvey – London
Turvey’s long-exposure shots from the South Bank capture the winding light trails along the Thames, using reflections and architecture to frame scenes emphasizing urban rhythm.
Photographer Naoki Honjo – Tokyo
Honjo creatively uses vibrant neon embedded within light trails on busy intersection corners, rendering vibrant and abstract city portraits that thrive on color juxtaposition.
These examples demonstrate how mastering technique combined with a sharp artistic vision elevates urban light trail photography beyond routine snapshots to compelling visual narratives.
Conclusion: Bringing Your Urban Light Trail Photography to Life
Mastering light trails in busy urban centers transforms lackluster nighttime photography into captivating visual symphonies of color and motion. The process hinges on technical proficiency—balancing shutter speed, aperture, ISO—and solid preparation with good gear. Additionally, understanding your environment and approaching each scene creatively will enable you to craft images that not only showcase the physical city but also its dynamic energy and soul.
Start experimenting with different urban locations, light patterns, and compositions today. With patience and practice, your camera will reveal the city’s nocturnal heartbeat in luminous flows that inspire awe.
Lights trails are more than just streaks on a photo—they are narratives captured in light, telling vibrant city stories waiting just for you to embrace and create.
Happy shooting, and may your urban nights sparkle with endless possibilities!
Rate the Post
User Reviews
Other posts in Night Photography


Popular Posts


