Is Melt And Pour Soap Better For Beginners
32 min read Compare melt-and-pour vs cold process for first-time soapmakers, with pros, cons, safety, costs, and step-by-step readiness tips to choose your best beginner path. (0 Reviews)
If you’ve ever scrolled past mesmerizing soap videos—shimmering layers, jelly-like embeds, confetti ribbons—you’ve probably wondered whether you need to work with lye on day one to make soap you’re proud of. The short answer: no. Melt and pour (M&P) soap gives beginners a head start without sacrificing creativity. But the longer, more useful answer is about what you gain, what you trade off, and how to decide if it’s the right first step for you.
What “Melt and Pour” Actually Is
Melt and pour is a pre-made soap base that you cut, melt, customize, and pour into molds—no lye handling required. It’s real soap (typically a saponified blend of vegetable oils) that’s been formulated to remelt safely and accept additives like colorants, fragrance, and exfoliants.
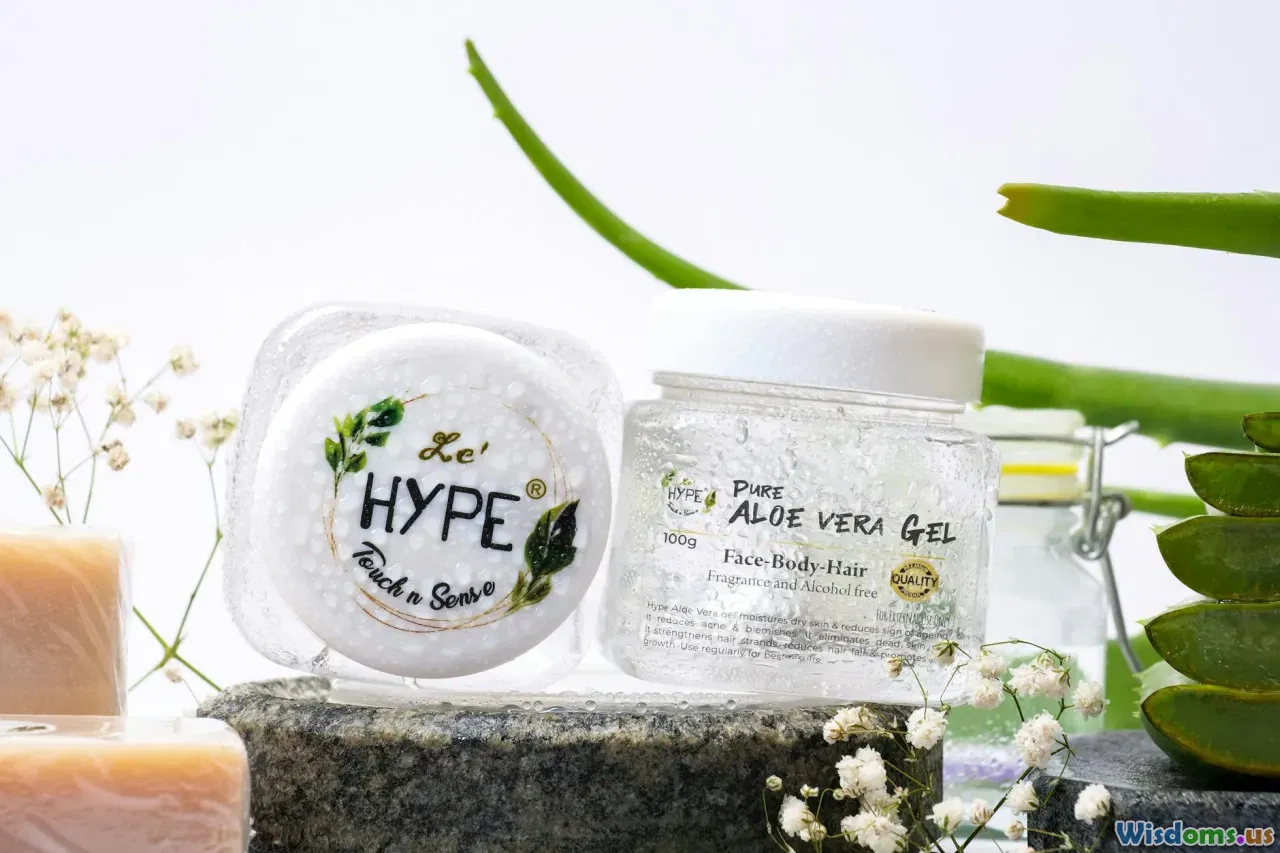
A typical clear base ingredient list (INCI) might read: Sodium Palmate, Sodium Palm Kernelate, Water, Glycerin, Sorbitol, Propylene Glycol, Sodium Stearate, Sodium Laurate, Sodium Laureth Sulfate (varies), Sodium Chloride, Titanium Dioxide (for white bases), plus chelators and preservatives. Not all bases include synthetic surfactants; you’ll find “SLS-free” or “detergent-free” options that omit SLS/SLES. There are also specialty bases: goat milk, shea butter, aloe, oatmeal, honey, palm-free, and vegan.
Key properties beginners care about:
- Melt range: Generally 140–160°F (60–71°C), with ideal pouring around 130–140°F (54–60°C) to minimize moisture loss and bubbles.
- Transparency: Clear bases are ideal for embeds and stained-glass effects; white bases give pastel, opaque colors.
- Glycerin content: High glycerin contributes to a mild feel and characteristic “sweating” in humid climates.
- Ready-to-use: No cure time; once it hardens (often within a few hours), it’s safe to use.
The takeaway: M&P isn’t a shortcut to “fake” soap—it’s a different process that front-loads the chemistry so beginners can focus on design, scent, and basic technique.
The Beginner’s Dilemma: Comparing Methods
To decide if melt and pour is better for beginners, compare it with cold process (CP) and hot process (HP).
- Cold Process (CP): You mix sodium hydroxide (lye) with water and oils to create soap from scratch. You control the fatty acid profile (hardness, lather, conditioning), but you need to calculate lye amounts accurately, manage temperatures, and wait 4–6 weeks for the bar to cure.
- Hot Process (HP): Similar base chemistry to CP but heated through saponification so it’s ready sooner. You still work with lye and often get a rustic texture, but you can use HP soap sooner than CP (though it benefits from a short dry-out period).
- Melt and Pour (M&P): Skip the lye stage because it’s already saponified. Fast, accessible, and rich in design possibilities. Fewer formulation knobs to turn.
A practical scenario for a beginner: You have two hours on a Saturday, a small kitchen, and zero tolerance for lingering chemical odors or long cure times. With CP, you’d spend that time mixing, molding, insulating, then waiting weeks. With M&P, you can melt, scent, color, pour, and gift wrap by the afternoon.
What you trade: Control over base composition (e.g., you can’t dial in a coconut/shea balance to achieve a specific fatty acid profile). For many beginners, the speed and lower risk more than offset that.
Skill Curve and Safety: Why Many Start With Melt and Pour

Beginners typically worry about two things: making a usable product and staying safe. M&P lowers the barrier on both.
- No lye handling: You avoid hazards like exothermic reactions and potential lye splashes. That’s crucial if you’re practicing in a small space or around pets or kids.
- Kitchen-friendly setups: A microwave or double boiler, silicone molds, 91% isopropyl alcohol, and a heat-safe container are enough to start.
- Fewer critical variables: No need to monitor trace, gel phase, or insulation. You focus on temperature control and pour timing.
“Safe” doesn’t mean “careless,” though. M&P is still hot liquid soap.
Basic safety checklist:
- Always use heat-resistant gloves and eye protection when handling hot base.
- Avoid overheating; above about 170°F (77°C), bases can dehydrate, creating shrinkage, cloudiness, or skin irritation.
- Use short microwave bursts (15–30 seconds), stirring between bursts to prevent localized boiling.
- Keep isopropyl alcohol away from open flame—it’s flammable.
- Never add water directly to hot base; it can spatter and split the base.
If your main goal is to explore fragrance blending, color work, and creative designs with minimal risk, M&P is an easier entry point.
What You Can and Can’t Control With Melt and Pour
Control you do have:
- Fragrance and essential oil blends. Example: A softly balanced lavender, petitgrain, and benzoin absolute at a total of 0.8–1.5% of soap weight (check IFRA/usage guidelines for each oil).
- Color. Micas and liquid glycerin-based dyes perform especially well; ultramarines, oxides, and clays work with pre-dispersion.
- Texture. Add exfoliants (ground oats, jojoba beads, pumice, poppy seeds) at 0.5–2% by weight; adjust based on comfort.
- Visual design. Layers, embeds, pencil lines (using cosmetic-grade mica), confetti, and even clear “windows” over pressed botanicals.
Control you don’t have—or have less of:
- Fatty acid profile. Lather type, hardness, and longevity are baked into the base. You can tweak feel slightly with small additions like glycerin (1–3%) or butters (up to 3–5%), but too much can soften the bar and cause sweating.
- Water content and cure. M&P is formulated with a specific water-to-solids ratio and humectants; adding free water or fresh purees risks weeping and microbial issues.
- Slow-set swirls. Because M&P sets quickly as it cools, the intricate, slow-moving swirls common in CP are difficult. Designs favor layers, embeds, and surface swirls instead.
Knowing where M&P shines helps you channel beginner energy into wins: visually stunning, well-scented bars you can use immediately.
Cost and Time: A Realistic Breakdown

Typical starter supplies and costs (US mid-range retail):
- Melt and pour base: $4–8 per pound (454 g). One pound makes roughly four 4-ounce (113 g) bars.
- Fragrance or essential oils: $2–6 per project (varies by oil type and usage rate).
- Colorants: $1–3 per project (you’ll buy larger packets that last many batches).
- Molds: $8–20 for a silicone loaf mold or a 4–6 cavity bar mold. Reusable.
- Tools: A $10 heat-safe pitcher, $2 silicone spatula, $3 sprayer for 91% isopropyl alcohol, optional digital thermometer ($10–15).
Cost per bar estimate:
- Base: $1.00–$2.00
- Fragrance/color/embeds: $0.30–$0.70
- Packaging: $0.15–$0.40 (shrink wrap, labels) Total: Approximately $1.45–$3.10 per bar, depending on choices. Retail craft market prices for M&P bars commonly range from $5–$8, but check local norms and factor in your time.
Time comparison for a beginner batch:
- M&P: 30–90 minutes including melt, color, pour, set (pop out of molds within 1–4 hours). No cure time.
- CP: 1–2 hours to make and mold; 24–48 hours to unmold; 4–6 weeks to cure.
- HP: 2–3 hours active; usable within days, but improves after a brief dry-out.
If you’re testing scents, running a school workshop, or producing event favors on a deadline, M&P time savings are hard to beat.
First Project: A 60-Minute Beginner Soap With Melt and Pour
Project goal: Eight classic lavender bars with a gentle pastel hue and light exfoliation.
Yield: About 2 pounds (907 g) of soap; approximately eight 4-ounce bars.
Ingredients and tools:
- 2 lb (907 g) melt and pour base (half clear, half white for a soft opacity)
- Lavender essential oil at 0.8–1.0% (7–9 g per pound; total 14–18 g). If using fragrance oil, follow supplier usage rate (often 2–3%).
- 1–2 g purple mica pre-dispersed in 1 tsp glycerin, or a liquid soap colorant
- 10–20 g finely ground oatmeal (optional, for gentle exfoliation)
- 91% isopropyl alcohol in a spritzer
- Silicone 8-cavity bar mold or loaf mold
- Heat-safe pitchers (2), silicone spatula, digital thermometer (optional), kitchen scale, and gloves
Steps:
- Prep color and mold. Disperse mica in glycerin to avoid speckling. Place your mold on a flat, wipeable surface.
- Chop and melt. Cut the base into 1-inch cubes. Melt the white base first in a pitcher using 20–30 second microwave bursts, stirring between bursts. Stop around 140°F (60°C). Repeat with clear base in a second pitcher.
- Scent and color. Add lavender EO to the clear base; stir gently to minimize bubbles. Add mica to the white base; stir well. If using oatmeal, split between both pitchers at 0.5–1% per base weight.
- Pour in layers. Pour a thin white layer (about 1/3 depth). Spritz with isopropyl alcohol to remove surface bubbles. Wait 3–5 minutes until a light skin forms.
- Anchor layers. Spritz the surface with alcohol again for adhesion and pour a thin clear layer. Repeat to create three or four stripes. If skin forms too quickly, re-warm a few seconds to restore fluidity.
- Finish and set. Spritz the final surface to clear bubbles. Let the mold sit undisturbed at room temperature. Unmold after 1–3 hours.
- Wrap and label. After 24 hours, shrink wrap or tightly wrap in plastic to reduce glycerin dew. Label with weight, scent, and date.
Tips for the first run:
- Keep pour temps in the 130–140°F (54–60°C) window. Too hot can melt prior layers; too cool can trap bubbles.
- If layers separate, you likely poured too cool or skipped the alcohol spritz. Lightly scoring the surface with a fork before the next pour improves grip.
- Start with low scent usage, then adjust in future batches. Some oils accelerate setting or cloud clear bases.
Avoiding Common Mistakes (and How to Fix Them)

- Overheating. Sign: rubbery, shriveled bars with a strong odor. Fix: Use shorter microwave bursts; switch to a double boiler for gentle, even heat. Keep below 170°F (77°C).
- Bubbles. Sign: a fizzy top or tiny bubbles in clear sections. Fix: Stir slowly; spritz the surface after each pour with 91% isopropyl alcohol; pour at proper temps to reduce entrainment.
- Layer separation. Sign: layers sliding apart. Fix: Spritz with alcohol right before pouring the next layer; pour while the previous layer is set but still slightly warm; score the surface.
- Glycerin dew (“sweating”). Sign: droplets on the surface in humidity. Fix: Wrap bars tightly; store with silica gel packets; choose a low-sweat base if you’re in a tropical climate; avoid storing in bathrooms.
- Cloudiness in clear base. Sign: a hazy block. Fix: Avoid adding powders directly; pre-disperse in glycerin or a bit of warmed base; keep percentages low. Some fragrance oils also cause haze—test in small batches.
- Additive overload. Sign: soft, sticky bars or weeping. Fix: Keep oils/butters below 3–5% of base weight; keep exfoliants under 2%; avoid fresh fruit, dairy, or water-based purees.
One of the best beginner habits is keeping a simple log: base type, melt temp, pour temp, additive grams, and observations. You’ll learn which fragrance oils behave beautifully and which need a different approach.
Make It Look Professional: Design Techniques That Work in M&P
- Crisp layers. Pour thin layers (0.25–0.5 inches) with alcohol spritz between. Temperature matters: too hot melts the previous layer; too cool causes ridges and poor adhesion. Aim for a skin that holds your finger without denting.
- Embeds. Use clear base for visibility. Pre-make shapes (stars, hearts, confetti curls), spritz both embed and fresh pour with alcohol, and pour around 130°F (54°C) so embeds don’t melt.
- Surface swirls. Classic CP swirls don’t translate directly, but you can swirl on the surface: pour two colors at slightly different temps and drag a skewer in figure-eights before it sets.
- Pencil lines. A whisper-thin line of cosmetic mica dusted between layers gives an elegant stripe. Dust sparingly or it may cause splitting.
- Gradient ombré. Mix a small amount of colored base into uncolored base for the first layer; add more color incrementally across subsequent layers to build a fade.
- Clear “window” designs. Pour a thin clear layer over pressed botanicals (e.g., calendula petals). Note that botanicals can brown over time; choose color-stable ones and test longevity.
A pro finish often comes down to neat edges and bubble-free surfaces. A quick pass with alcohol immediately after pouring makes a noticeable difference.
Ingredients That Play Nicely (and Those That Don’t)

Additive guidelines (by total base weight):
- Fragrance oils: Commonly 1–3%. Always check supplier maximums and note that some FOs discolor to tan due to vanillin.
- Essential oils: 0.5–1.5% depending on oil and IFRA limits. Example: lavender often up to ~2% in soap, but many keep it closer to 1%. Cinnamon bark or clove are potent and can be irritating; use conservative rates or avoid for beginners.
- Colorants: Start tiny. Micas are vibrant; a gram goes a long way. Liquid colorants help prevent speckling in clear bases.
- Exfoliants: 0.5–2%. Pumice and walnut hull are aggressive; ground oats and jojoba beads are gentle.
- Butters and oils: 1–3% for slip and feel; too much can make bars soft or greasy.
- Clays: 0.5–1%, pre-dispersed in glycerin. Clay can dull transparency and shorten lather; lovely in facial bars.
Additives to avoid or use with care:
- Fresh fruit, milk, or water. These introduce water and sugars without preservation; risk of microbial growth and sweating is high. Use a base that already includes milk if you want that label claim.
- Large botanicals. Whole lavender buds look charming on day one but often brown within weeks in high-glycerin environments. Consider embedding them just beneath the surface or using a mica “confetti” instead.
Test small. Fragrance behavior varies widely: citrus EOs can fade; vanilla-rich FOs can turn bars tan; some FOs loosen or tighten base fluidity. A 2–4 oz test saves a full batch.
Packaging, Storage, and Shelf Life
- Packaging. Shrink wrap is the gold standard for M&P because it locks out humidity and prevents glycerin dew. Alternative: tight plastic film or bio-based wraps, though they may be less moisture-proof. Paper-only wraps look artisanal but breathe; consider a barrier layer beneath.
- Storage environment. Cool, dry, and out of direct sunlight: 60–75°F (16–24°C), relative humidity below ~50% if possible. UV can fade colors and degrade some fragrances.
- Shelf life. The base itself is typically stable for 12–24 months depending on oils used. Finished soap commonly lasts 9–18 months, with scent and color slowly fading. Use silica gel packets in storage bins.
- Labeling basics. If selling in the U.S., label the net weight, business identity, and an ingredient list. For M&P, you list the base ingredients (provided by the manufacturer) plus your added colorants and fragrance. Follow local regulations for cosmetics versus true soap labeling requirements.
Pro tip: Date your batches. If a particular fragrance fades at the 6-month mark, you’ll know to reserve it for quick-turnover products.
Eco and Skin Considerations: Is M&P “Natural” Enough?
“Natural” means different things to different makers. M&P bases vary:
- Some rely solely on saponified oils (e.g., coconut, palm, olive) plus humectants like glycerin and sorbitol.
- Others include synthetic surfactants (SLS or SLES) for boosted lather and clarity. If you prefer to avoid them, look for “SLS-free,” “SLES-free,” or “detergent-free” bases and confirm by reading INCI.
- Palm-free and vegan options exist. If palm sustainability matters, seek RSPO-certified sourcing or palm-free bases (often using coconut and rapeseed).
Skin perspective:
- pH: Like CP or HP soap, M&P generally sits around pH 9–10. It cleans effectively but can feel drying for some skin types. High glycerin helps offset tightness.
- Sensitive users: Fragrance is the most common irritant. Start unscented or use well-tolerated EOs at low rates (e.g., lavender, chamomile) and patch test.
- Transparency does not equal harshness, and opacity does not guarantee gentleness; performance depends on the base formula and additives.
If your eco priority is minimal processing, CP may eventually appeal because you can choose every oil and exclude glycols. If your priority is reducing waste and failed batches, M&P’s high success rate and low discard can be greener in practice.
When to Graduate to Cold Process—or Blend Methods
Start with M&P to master:
- Clean working habits, temperature control, and design principles.
- Scent solubility and color behavior.
- Packaging and presentation.
Move to CP when you want:
- Total control of fatty acid profile (e.g., 20% coconut for cleansing, 5% castor for lather, high oleic for conditioning).
- Slow-fluid designs (e.g., hanger swirls, in-the-pot swirls) and rustic textures.
- The ability to incorporate higher levels of niche oils or fresh additives in a controlled, saponifying system.
Hybrid ideas to bridge the gap:
- MP embeds in a CP loaf. Pour CP around pre-made M&P shapes (keep embeds very dry and spritz with alcohol); the effect is striking.
- MP frosting or glazing. Create a clear “window” top on a CP bar after cure using a thin M&P layer.
There’s no rule that says you must “graduate.” Many artisan brands sell both, using M&P for intricate visual pieces and CP for soap nerd formulations.
Quick Decision Guide: Is Melt and Pour Better for You?

Answer these prompts:
- You want usable bars today or this weekend. If yes, M&P wins.
- You don’t want lye in your kitchen yet. If yes, M&P wins.
- You prioritize design (layers, embeds, crystal-clear windows). If yes, M&P wins.
- You want to formulate your bar from scratch (oil percentages, superfat, additives in sap). If yes, CP/HP wins.
- You love slow, complex swirls and textured tops that hold definition. If yes, CP may be the better canvas.
- You plan to sell a minimalist-ingredient bar. If yes, CP/HP may give you simpler INCI lists (depending on your base choice, though some M&P bases are also straightforward).
Pros of starting with M&P:
- Fast successes boost confidence.
- Lower equipment and safety barriers.
- Great for workshops, fundraisers, and events with time limits.
Trade-offs:
- Less control over cleansing/conditioning profile.
- Potential glycerin dew without careful packaging.
- Some buyers perceive CP as “more natural,” depending on base composition and marketing norms.
Myth-Busting: Common Misconceptions About M&P
- “M&P isn’t real soap.” False. Many bases are saponified oils. Some include synthetic surfactants, but that doesn’t make them “fake”; it changes lather and clarity.
- “You can’t make sophisticated designs.” False. You can create multi-layered bars with embeds, mica lines, and clear windows that CP cannot replicate as easily.
- “It’s always gentler.” Not necessarily. pH and base composition drive skin feel; fragrance choice matters more for irritation risk than the process alone.
- “You can’t customize much.” You can customize scent, color, look, and texture extensively. What you can’t do is rewrite the base’s fatty acid backbone.
Understanding what’s true helps you explain your choices to customers, friends, or yourself.
Small Experiments to Build Skill Fast

- Fragrance retention test. Pour three 2-oz testers at 0.5%, 1.0%, and 1.5% of a single oil. Label and sniff at 1 week and 4 weeks to learn fade patterns.
- Color clarity test. Split a clear base into four cups; add mica, liquid dye, and pre-dispersed oxide at micro-levels. See which stays crystal clear.
- Layer adhesion test. Pour a warm layer onto a fully cooled layer with and without alcohol spritz. Gently flex after 24 hours to assess bond.
- Sweat resistance test. Store one wrapped and one unwrapped bar in a bathroom for a week. Observe glycerin dew and adjust packaging.
Each experiment takes minutes and pays you back for dozens of future batches.
Light Business Considerations for Beginners

- Pricing. Track actual costs: base, fragrance/color, packaging, overhead (electricity, shrink bags, booth fees). A simple formula is cost x 3 for retail pricing, then check local benchmarks.
- Batch consistency. Use a digital scale and record grams, not “drops.” Replicable recipes build brand trust.
- Compliance. In many regions, soap made primarily from the alkali-fat reaction can be sold as “soap” and is exempt from some cosmetic rules; once you claim skin benefits beyond cleansing or add non-soap surfactants, labeling rules shift. Learn your jurisdiction’s regulations.
- Brand story. M&P can be your visual showcase—crystal-clear embeds, seasonal designs, and giftable sets. Lean into the design-friendly advantages.
If your early mission is to test markets and aesthetics without curing racks and lye storage, M&P is a strategic starting point.
Resources and Next Steps
- Supplier categories to explore: reputable soap supply shops for M&P bases (clear, white, goat milk, shea), SLS-free options, cosmetic-grade micas, and skin-safe fragrance oils with published usage rates.
- Tools to upgrade over time: a precision thermometer, a mini hand mixer for color dispersion, better molds (heavy silicone or HDPE), and a heat gun for polishing surfaces.
- Learning paths: Join maker forums or local craft groups to trade fragrance behavior notes; follow safety and IFRA guidelines for essential oils; test, document, iterate.
A practical next step: Set aside two evenings—one to run the lavender project above exactly as written and one to iterate a variation (swap mica color, try a vanilla FO and watch for discoloration, or add a transparent embed). Keep meticulous notes. Two small runs will tell you more than a dozen videos.
A smooth path into soapmaking combines early wins with curiosity. Melt and pour is often the better path for beginners because it removes the high-stakes chemistry and replaces it with approachable craft. Master the pour, the scent, and the finish now; when you’re ready to shape the soap from its very molecules, cold process will be waiting—and you’ll bring a confident maker’s eye to every batch.
Rate the Post
User Reviews


Popular Posts


