
Top Five Mistakes Road Trippers Make and How to Avoid
26 min read Avoid five common road trip mistakes with practical planning, budget, safety, and tech tips to keep your journey smooth, on-time, and stress-free. (0 Reviews)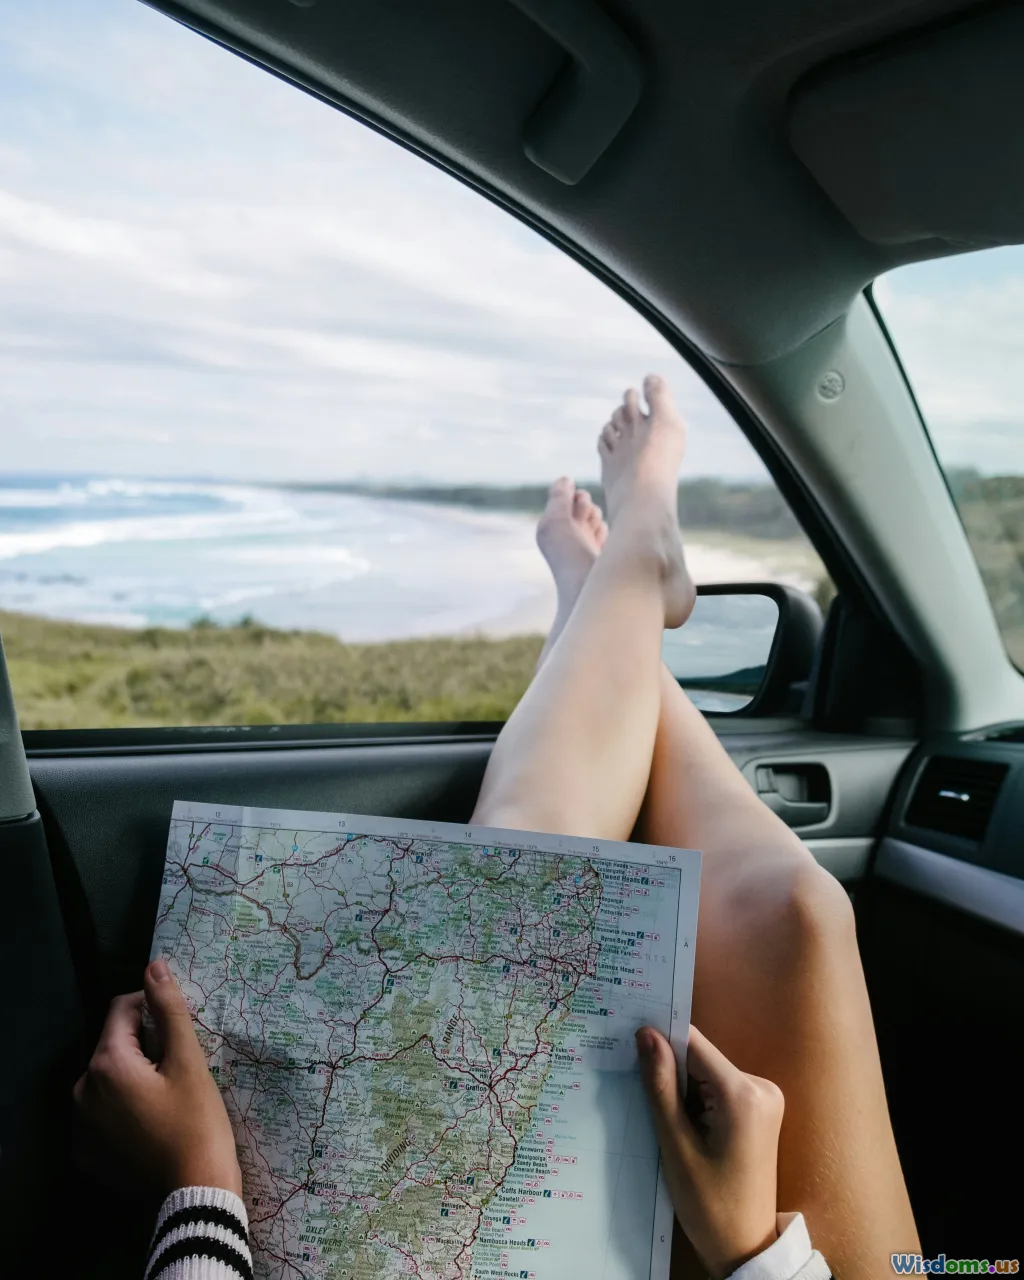
There’s a reason road trips fuel so many great stories: they mix spontaneity with strategy, and the miles in between become part of the fun. But there’s also a pattern to the problems people face on the highway—missed turns in dead zones, overstuffed trunks that tank fuel economy, nap-deprived drivers pushing past their limits. The good news is that most headaches are preventable with a little foresight and the right habits. Here are the top five mistakes road trippers make—and practical ways to avoid them, with examples, tools, and on-the-road tactics you can apply immediately.
Mistake 1: Building an Itinerary That Only Works on Paper

On paper, you can sprint from desert canyons to mountain peaks and back before dinner. On the road, construction zones, weather, slow service lanes, and the simple need to rest stretch that fantasy thin.
Common patterns that break real-world itineraries:
- Overambitious drive times: Mapping tools often use ideal conditions. Add 15–25% padding to any ETA to account for traffic, fuel stops, photo ops, and unexpected detours. If a mapping app says 6 hours, budget 7.5.
- Back-to-back long hauls: Two 10-hour days is a recipe for burnout and drowsy driving (more on that later). Cap most driving days at 6–7 hours behind the wheel.
- Ignoring time zones and park entries: Crossing time zones can quietly push dinner into night driving. Popular parks—including Arches, Glacier, or Acadia—often use timed-entry reservations in peak season; showing up “whenever” can mean “not today.”
- Underestimating distances between services: In the rural West (think US-50 in Nevada or stretches of US-191 in Utah), towns can be 60–100 miles apart with few 24-hour options.
How to build a resilient itinerary (that still feels free):
- Choose anchors and then “floaters.”
- Anchors: fixed reservations or must-see stops (for example, a timed-entry window for Rocky Mountain National Park from 9–11 a.m.).
- Floaters: nice-to-have attractions within an hour of your route that you can drop when you’re behind or add when you’re ahead.
- Use a drive-time cap and a daily rhythm.
- Decide your limit (say, 7 hours including stops). Work backward to pick your lunch and two 15-minute stretch breaks.
- Give each day a shape: depart, scenic stop, lunch, afternoon leg, check-in, evening walk. If it doesn’t fit the shape without rushing, trim it.
- Budget a 20% flex margin for the week.
- On a 7-day trip, explicitly plan one “light” day or half-day buffer you can reallocate after a storm, traffic pileup, or a can’t-miss hike that ran long.
- Reality-check with local sources.
- Check the state DOT for roadwork and closures (e.g., Caltrans QuickMap for California, NCDOT for North Carolina). Mountain passes like Tioga Pass (CA-120) or Independence Pass (CO-82) are seasonal and can close with little notice early or late in the year.
- If you’re hitting national parks, look at the park’s daily alerts page a week out and the night before you go.
- Avoid “boomerang” routing.
- Group sights by region. If you’re doing the Southwest, don’t ping-pong: Los Angeles → Grand Canyon → Zion → Bryce → Arches fits a broad eastward arc; doing Zion after Arches, then back to Bryce adds hundreds of wasted miles.
Example triage: You want to drive the Blue Ridge Parkway and also squeeze in a long Asheville brewery tour. Keep the drive scenic day light (less than 4 hours total parkway time), then build your Asheville evening. If rain socks in the ridgelines, invert the plan: do breweries first, drive the parkway next day when views return.
The payoff for disciplined planning isn’t rigidity; it’s stress-free room to improvise when the landscape invites you to linger.
Mistake 2: Skipping Vehicle Prep and Loading Smart

The most common roadside delays aren’t exotic; they’re tires, batteries, and simple neglect. A 30–45 minute pre-trip check can save hours on the shoulder later.
What to check—quick and concrete:
-
Tires
- Tread depth: Use a tread gauge or the “penny test.” If Lincoln’s head is fully visible, you’re at 2/32 inch or less—time to replace. For heavy rain, many experts recommend at least 4/32 inch for better wet traction.
- Pressure: Check when cold, using the door-jamb sticker (not the sidewall max). Underinflation reduces fuel economy and increases heat buildup.
- Spare reality check: Many newer cars ship with an inflator kit instead of a spare. Know what you have and how to use it. “Donut” spares often have a 50 mph speed limit and short range—plan your route to the nearest tire shop, not the next state.
-
Battery
- If your car is 4–6 years old or cranks slowly, get a battery test at an auto parts store—they’ll often do it free. Extreme heat and short errand cycles weaken batteries.
-
Fluids and visibility
- Oil: Confirm level and change interval timing relative to your mileage.
- Coolant and brake fluid: Glance for proper levels; leaks warrant attention.
- Wiper blades and washer fluid: A $15 set of blades is cheap insurance in mountain thunderstorms.
- Lights: Do a full walk-around—headlights (both beams), turn signals, brake lights, and hazards.
-
Brakes and steering
- If you feel pulsing, grinding, or a pull when braking, get it checked before you’re descending a grade with a full load.
Load smart to drive safer and spend less on fuel:
- Pack heavy items low and centered. Keeping mass near the vehicle’s center of gravity improves stability and braking. Avoid stacking heavy boxes on roof racks.
- Roof boxes and racks reduce fuel economy—independent tests by automotive publications have shown double-digit mpg hits at highway speeds. If you must use one, pack light, keep speeds modest, and remove crossbars when not carrying loads.
- The EPA notes that an extra 100 pounds in your vehicle can reduce mpg by about 1%, especially in smaller cars. Pare down: water is essential, but the fourth pair of boots is not.
Your 30-minute pre-trip routine:
- Inflate tires to spec and verify the spare/inflator kit is present.
- Top up washer fluid; replace wipers if streaking.
- Check oil and coolant levels.
- Confirm all lights work.
- Test the battery (or at least note its age). Toss in a lithium jump starter if you have one.
- Load with weight low and balanced; secure loose items so they don’t become projectiles in a sudden stop.
Tools worth their weight:
- Compact air compressor (12V) and a tire plug kit. A plug can fix many punctures from nails or screws well enough to reach a shop.
- Torque wrench or at least a solid lug wrench—factory wrenches are often flimsy.
- Work gloves, headlamp, and shop towels.
- A compact, UL-listed fire extinguisher and a reflective triangle.
A small investment in maintenance translates to quieter cabins, fewer roadside surprises, and better handling when the road gets interesting.
Mistake 3: Navigating Without Redundancy (and Offline Backups)

We’re used to turn-by-turn directions that never stutter. Until they do. Canyon walls, dense forests, storms, and rural corridors can starve your phone of signal—or your battery of charge—at the worst moment.
Build a layered navigation plan:
-
Download offline maps in advance.
- Google Maps: Select regions along your route and download them for offline use (they auto-expire, so refresh before you go). Save pins for trailheads, gas, and lodgings.
- Apple Maps: Recent iOS versions support offline maps; create a custom area that covers your day’s corridor plus detour room.
- Specialty apps: For detailed topography and trails, consider apps that cache maps offline; verify coverage for your destinations.
-
Keep a paper backup.
- A fold-out state map or an atlas lives forever in the glove box. Mark your anchors and alternates. Highways rarely vanish, and in a pinch, analog clarity beats a dead screen.
-
Power redundancy matters.
- Bring a 12V fast charger and at least one 10,000–20,000 mAh power bank. Pack two durable cables per device type (USB-C, Lightning) because cables fail more often than phones.
- Mount your phone low and out of your primary sight line. Some states restrict windshield mounts in the center field of view; a vent or dash mount placed low and to the side is generally safer.
-
Store critical info locally.
- Screenshots of reservation codes, gate keypads, and host directions; PDFs of ferry schedules; photos of your driver’s license and vehicle registration (store securely).
-
Fuel/charge with foresight.
- Gas: In sparsely populated areas, top off when you reach half a tank, not when the light pops on. In Utah’s Scenic Byway 12 corridor or West Texas stretches of I-10, service gaps can be 60–100 miles.
- EVs: Plan with a tool like A Better Routeplanner or PlugShare. Aim to arrive with 10–20% state of charge, and when possible, charge from roughly 10–80% to ride the faster part of most charging curves. Have a backup charger in mind in case one station is down or busy.
Example: You’re driving US-395 on the east side of the Sierra in late fall. Cell service fades near canyons; Tioga Pass may already be closed. You’ve pre-downloaded maps from Bishop to Carson City, saved a detour via Monitor Pass, and noted two chargers in Mammoth and Bridgeport with a third in a nearby town. Even if a winter squall rolls in, you’re not improvising in the dark with 8% battery and no bars.
Redundancy isn’t paranoia; it’s what lets you keep the trip fun when the unexpected shows up, as it always does.
Mistake 4: Treating Sleep, Weather, and Safety Gear as Afterthoughts

The classic “we’ll push through” mindset ignores basic human limits and the power of weather to reshape plans.
Drowsy driving is real and measurable. The National Highway Traffic Safety Administration has estimated about 91,000 police-reported crashes in a recent year involved drowsy drivers, contributing to thousands of injuries and hundreds of deaths annually. If you feel your eyelids drooping, you’re already behind the problem.
Build a safety-first routine:
-
Set a two-hour/100-mile check-in rule.
- Every couple hours, take five minutes to stand, stretch, hydrate, and reassess: swap drivers if you can, snack smartly, and make sure the cabin isn’t overheated and soporific.
-
Use strategic micro-rest.
- If you’re drowsy, a 15–20 minute nap in a safe, legal spot can markedly improve alertness. Pair a quick coffee before the nap for a “caffeine nap” effect as the caffeine kicks in when you wake.
-
Don’t let arrival times bully you.
- If poor visibility, high winds, or thunderstorms kick up, slow down or stop. Your reservation is not worth a white-knuckle night drive.
Weather is a force multiplier:
-
Mountain weather changes fast.
- Summer thunderheads can drop torrential rain and hail in minutes. Descend if lightning is nearby; wet, leaf-littered curves demand gentler inputs and more following distance.
-
Desert storms can mean flash floods.
- Don’t cross flowing water over the road, even if it looks shallow. Heed barricades—washouts can undercut pavement you cannot see.
-
Seasonal and regional quirks.
- Blue Ridge Parkway fog can cut visibility to car-lengths. Western wildfire smoke degrades air quality; check local advisories. In snow country, chains may be required; carry them and practice installing once at home if you’re new to the ritual.
Safety gear that earns its space:
- Tire kit: 12V inflator, plug kit, pressure gauge. Quick how-to for a simple puncture: remove the nail, twist the reamer to clean, insert the plug with rubber cement, trim, inflate, and check for leaks with soapy water.
- Jump start options: heavy-duty jumper cables or a lithium jump pack with enough cold-cranking amps for your engine size. If using cables, connect positive to positive, negative to a bare metal ground on the dead car, not the negative post.
- Visibility and breakdown gear: reflective triangles or LED flares, hi-vis vest, headlamp with fresh batteries.
- First-aid: adhesive bandages, gauze, antiseptic wipes, tweezers, pain relievers, antihistamines, blister care, and any personal meds.
- Comfort supplies: warm blanket, gloves, rain shell, sunscreen, hats, and a sunshade for the windshield.
- Traction and recovery (seasonal/terrain): compact shovel, traction boards or kitty litter for snow/ice, tow strap if you know how to use it safely.
- Water and snacks: aim for at least 2 liters per person for the day in summer conditions, plus shelf-stable snacks that don’t melt instantly.
Kids and pets, specifically:
- Children: Confirm your state’s car seat and booster rules and that your seat is installed tightly with the seat belt or LATCH system. The seat shouldn’t shift more than an inch at the belt path.
- Pets: Use a crash-tested harness or secured crate; unsecured pets can become dangerous projectiles and distract drivers.
A final note on speed and spacing: In rain, increase following distance and avoid cruise control on slick roads—hydroplaning can happen faster than you think. Smooth, early inputs turn bad weather from a crisis into a manageable variable.
Mistake 5: Ignoring the Money Math (Tolls, Fees, and False Economies)

Road trips feel cheaper than flights—until toll-by-plate fees, surprise parking rates, and a roof box’s wind drag chew through your budget. A little math upfront restores control.
Calculate your baseline fuel or charging costs:
-
Gas example: 1,200 miles in a car that averages 28 mpg at an average price of $3.80/gal.
- Gallons needed: 1,200 ÷ 28 ≈ 42.9 gallons
- Fuel cost: 42.9 × $3.80 ≈ $163
-
EV example: 1,200 miles at 3.2 mi/kWh, primarily DC fast charging at $0.45/kWh.
- kWh needed: 1,200 ÷ 3.2 ≈ 375 kWh
- Charging cost: 375 × $0.45 ≈ $169
Notice how similar those totals are? On some routes and seasons, EV charging can be cheaper or comparable to gas, but rates vary by network and location. Charging at home before departure and destination Level 2 charging can reduce your paid DC fast charging sessions.
Factor in the hidden line items:
-
Tolls
- Many regions are cashless now. Without a transponder (e.g., E‑ZPass, FasTrak), you may be billed by plate plus administrative fees. For rentals, toll-by-plate can trigger daily processing charges from the agency. Research your corridor’s system and consider ordering a compatible transponder or using a compliant rental toll program only on days you need it.
-
Parking and city surcharges
- Downtown hotel parking can be $30–$70/night. Some cities add congestion or facility fees. If visiting a major metro, compare costs between a suburban hotel near transit and a downtown stay.
-
Park and permit fees
- National park entry is often $20–$35 per vehicle; multiple parks in a year can justify the America the Beautiful annual pass (about $80). Popular state parks may charge day-use fees or require timed day-use reservations in peak months.
-
Lodging taxes and resort fees
- Expect 10–18% in occupancy and sales taxes in many places, plus mandatory “destination” or “resort” fees. A $140 room can land near $165 out-the-door.
-
Insurance and breakdown costs
- Confirm whether your auto policy or credit card covers rental car collision and roadside assistance. If not, budget for a short-term roadside plan or the rental agency’s options. Know what’s excluded (e.g., tires are often not covered).
-
Connectivity
- International drives can trigger roaming data charges. Use offline maps and, if needed, a local SIM or travel eSIM.
Trim costs without gutting the experience:
-
Food strategy
- Pack a cooler with ice packs, breakfast staples, and sandwich fixings for lunches on scenic pullouts. Eating one meal from your cooler daily can save $15–$25 per person. Choose dinners as your splurge in towns known for food.
-
Route efficiency
- Resist the false economy of a distant “cheaper” motel that adds an extra hour of driving. That hour costs fuel, time, and sleep quality. Often it’s smarter to pay $15 more to stay right off the highway and leave fresher.
-
Gear rentals vs. buying
- If you only need a roof box or bike rack once, consider renting locally rather than buying (and paying the fuel penalty all year). Return it when done.
-
Fuel economy discipline
- Drive smoothly, keep tires at spec, and avoid high-speed sprints. The aerodynamic drag penalty rises rapidly with speed; driving 70 instead of 80 can produce meaningful savings and reduce fatigue.
A five-minute budget sketch before you go—miles, mpg or mi/kWh, fuel/charging rates, lodging with taxes, expected tolls/fees—prevents the mid-trip “where did the money go?” panic and lets you redirect cash to the experiences you care about.
A Simple Pre-Departure Checklist You’ll Actually Use

Turn the anti-mistake playbook into action with a one-page routine:
-
Itinerary and timing
- Daily drive cap set (6–7 hours). 20% weekly flex baked in.
- Anchors reserved (lodging, park entries). Floaters listed by day.
- Time zones and sunrise/sunset times noted for photo plans.
-
Vehicle readiness
- Tires: tread checked, pressures set (including spare). Plug kit and inflator packed.
- Battery tested or age noted; jump pack or cables onboard.
- Fluids topped; wipers and all lights confirmed.
- Load heavy items low; roof gear minimized.
-
Navigation redundancy
- Offline maps downloaded and tested. Paper map in glove box.
- Power: 12V charger, power bank, two cables per device.
- Key reservations/screenshots saved locally.
-
Safety and comfort
- Emergency kit: first-aid, triangles/LED flares, headlamp, gloves, blanket, water, snacks.
- Weather reviewed for the next 48 hours; alternates chosen.
- Car seats/pet restraints checked.
-
Budget guardrails
- Fuel/charging plan sketched with stop candidates.
- Tolls/transponder strategy set; lodging taxes/resort fees anticipated.
- Cooler packed to offset one meal/day.
When you translate big ideas into bite-sized habits, the miles get easier, the surprises feel smaller, and the stories get better. With a sturdy plan, a tuned car, a rested mind, and a clear budget, you can say yes to detours without derailing your day—and let the open road do what it does best: turn lines on a map into places you’ll talk about for years.
Rate the Post
User Reviews


Popular Posts


